Weapons and armor get all the attention, but accessories are what separate a character that dies to every boss from one that dances around it. Each accessory slot is a stacking stat boost, a mobility upgrade, or a survival tool, and Terraria lets you reforge them on top for even more value. This guide walks through the best accessories by progression stage, the must-have movement and combat picks, and how the Menacing and Warding modifiers work, all verified against the official Terraria Wiki.
How accessory slots work
In Classic Mode you have 5 accessory slots. Expert Mode unlocks a sixth slot once you consume a Demon Heart (dropped by the Wall of Flesh). Master Mode gives the sixth slot by default, and consuming a Demon Heart on top brings the total to seven. Vanity accessory slots sit alongside these for cosmetics and dyes; only the functional slots affect your stats. Because slots are limited, every pick is a trade-off between damage, defense and mobility.
Best accessories by stage
The accessories below are listed roughly in the order you can realistically obtain them. If you are still working out which bosses unlock these tiers, our Terraria progression guide lays out the right order to fight everything.
| Accessory | Stage | What it does | How to get it |
|---|---|---|---|
| Terraspark Boots | Pre-Hardmode | Sprint to max speed (~35 mph), brief flight (~1.17 s), walk on water/honey/lava, fire immunity | Craft from Frostspark Boots + Lava Waders at a Tinkerer’s Workshop |
| Obsidian Shield | Pre-Hardmode | Knockback immunity + lava/fire debuff immunity (Cobalt Shield base) | Crafted at a Tinkerer’s Workshop from the Cobalt Shield + debuff items |
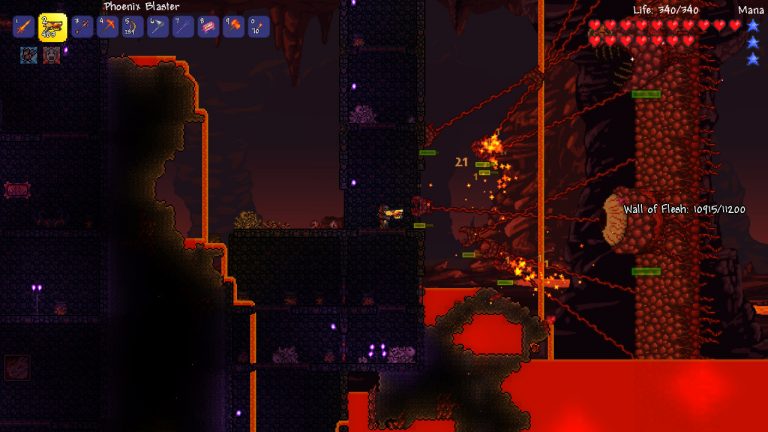
| Class Emblems | Hardmode | Class-specific damage boost (Warrior/Ranger/Sorcerer/Summoner Emblem) | Drop from the Wall of Flesh, then upgrade via Tinkerer’s Workshop |
| Fire Gauntlet | Hardmode (melee) | +12% melee damage and speed, +10% size, doubled knockback, autoswing, Hellfire debuff | Craft from Mechanical Glove + Magma Stone at a Tinkerer’s Workshop |
| Celestial Shell | Hardmode | Stacked werewolf/merfolk buffs to damage, defense, speed and regen | Craft from Moon Shell + Celestial Stone at a Tinkerer’s Workshop |
| Ankh Shield | Hardmode | +4 defense, knockback immunity, immunity to 12 common debuffs | Craft from Obsidian Shield + Ankh Charm at a Tinkerer’s Workshop |
| Master Ninja Gear | Hardmode | Wall climb, dash, and a 1/10 (10%) chance to auto-dodge attacks | Craft from Tabi + Black Belt + Tiger Climbing Gear |
Movement accessories: the boots line
Movement is the accessory category most players underrate. The boots line is a single upgrade chain you should pursue early: Hermes Boots (or Flurry/Sailfish Boots) combine into Spectre Boots, which become Lightning Boots, then Frostspark Boots. The endgame pre-Hardmode result is the Terraspark Boots, crafted at a Tinkerer’s Workshop from Frostspark Boots plus Lava Waders. They let you sprint up to roughly 35 mph, give a short burst of flight, walk across water, honey and lava, and grant fire-block and lava immunity. One slot, an enormous quality-of-life payoff.
For vertical control, the Master Ninja Gear adds a horizontal dash (double-tap left or right, one-second cooldown), wall climbing, and a 10% dodge chance. Note that its dodge does not stack with the Black Belt it is crafted from, so don’t equip both expecting double evasion.
Wings: your most important mobility slot
Once you enter Hardmode, wings effectively become mandatory for boss fights. The earliest crafted wings (Angel/Demon, Fairy, Frozen, Harpy) give around 1.67–2.17 seconds of flight. Mid-Hardmode wings after Plantera (Leaf, Bat, Bee, Bone and similar) push to roughly 2.67–2.83 seconds. The top tier reaches a flat 3 seconds: Fishron Wings from Duke Fishron, Steampunk Wings after Golem, and the Solar/Stardust Wings crafted from Luminite. In Expert Mode, the Celestial Starboard drops from the Moon Lord and matches that 3-second duration with much stronger acceleration. For the full ranked list and exact drop rates, see our dedicated Terraria wings guide.
Combat accessories by class
The four class Emblems (Warrior, Ranger, Sorcerer, Summoner) drop from the Wall of Flesh and are the backbone of any damage build; they later combine into the Avenger Emblem and Destroyer Emblem for stacked damage and crit. Melee players should chase the Fire Gauntlet: it grants +12% melee damage and speed, +10% weapon size, doubled knockback, autoswing, and inflicts the Hellfire debuff. The Celestial Shell is excellent for any class, layering small always-on bonuses with larger werewolf-form buffs at night and merfolk-form buffs underwater. Defensively, the Ankh Shield is the single best survival accessory in the game: +4 defense, knockback immunity, and immunity to 12 common debuffs including Bleeding, Burning, Poisoned, Confused and Cursed. Be aware it does not block stronger variants like Cursed Inferno or Frozen. Matching accessories to your weapon set matters as much as the gear itself, which our Terraria class guide breaks down per build.
Reforging: Menacing vs Warding
Every functional accessory can be reforged by the Goblin Tinkerer for a coin cost of about one-third the item’s value (reducible 20% with a Discount Card or Greedy Ring). Reforging rerolls the accessory’s modifier, and the two you’ll chase most are:
- Menacing — +4% damage. The go-to offensive roll, and especially valuable for summoners since minions cannot land critical hits.
- Warding — +4 defense. Described on the wiki as the best modifier in most scenarios for survival, particularly strong in pre-Hardmode and on high-defense builds.
- Lucky — +4% critical strike chance; better than Menacing if your damage is already high but your crit is low.
- Quick (+4% move speed) and Arcane (+20 max mana) are situational; Quick is generally too weak to prioritize.
A common approach is all-Warding while you learn a fight, then switching to all-Menacing once you can survive comfortably and want to shorten it. With 5–7 slots, that swing is up to 28% damage or 28 defense, so don’t skip reforging. The Goblin Tinkerer also unlocks the Tinkerer’s Workshop you need for nearly every accessory combine above; if he’s not showing up, our NPC happiness guide covers where to house him.
Frequently asked questions
How many accessory slots can I have in Terraria?
Five in Classic Mode. Expert Mode adds a sixth via a Demon Heart, and Master Mode starts with six and can reach seven with a Demon Heart on top. Vanity accessory slots are separate and don’t affect stats.
Should I reforge accessories to Menacing or Warding?
Warding (+4 defense each) is the safest all-round choice and shines when you’re learning a fight or on a high-defense build. Menacing (+4% damage each) wins once you can survive comfortably and want faster kills. Many players run Warding first, then swap to Menacing.
What is the best early movement accessory?
The Terraspark Boots, crafted from Frostspark Boots and Lava Waders at a Tinkerer’s Workshop. They roll sprinting, a short flight burst, liquid-walking and fire/lava immunity into one pre-Hardmode slot.
Accessory hunting is far more fun with friends grinding bosses and crates alongside you, and running your own Terraria server keeps the world online so everyone can farm at their own pace. If you need help getting set up, our Terraria server documentation walks through configuration step by step.
Ready to play?
Run your own Terraria server with XGamingServer
Spin up an always-on Terraria server your friends can join in minutes — no port-forwarding, no tech headaches.