
In this guide, we will show you how to install mods on your Valheim server
- What are Valheim Mods?
- How to install Valheim Mods on a gaming server
- Method 01:
- Installing Mods to Valheim using Panel Mod Manager
- Method 02:
- Installing Mods to Valheim using BepInExPack for Valheim manually
- Method 03:
- Installing Mods to Valheim using Valheim Plus Server.
- Bonus:
- How to Install mods on your valheim client using Mod Manager
- Thunderstore_Mod_Manager
What are Valheim Mods?
A mod (short for “modification”) is an alteration by players or fans of a video game that changes one or more aspects of a video game, such as how it looks or behaves. Mods may range from small changes and tweaks to complete overhauls and can extend the replay value and interest of the game. In case you are looking at how to install valheim mods on a server.
Over time, modded version of games has become so popular that the original version of the game is often referred to as plain vanilla this is most common with Minecraft.
Popular sites in which you can find mods include Nexus Mods.
How to install Valheim Mods on a gaming server
Running your game on our Valheim game server and want to spice things up with mods? Then we have you covered Below I have detailed how to install mods on XgamingServer panel.
Method 01:
Installing Mods to Valheim using Panel Mod Manager
Our game panel now comes with a mod manager one-click mod installer, pulling mods from valheim.thunderstore.io
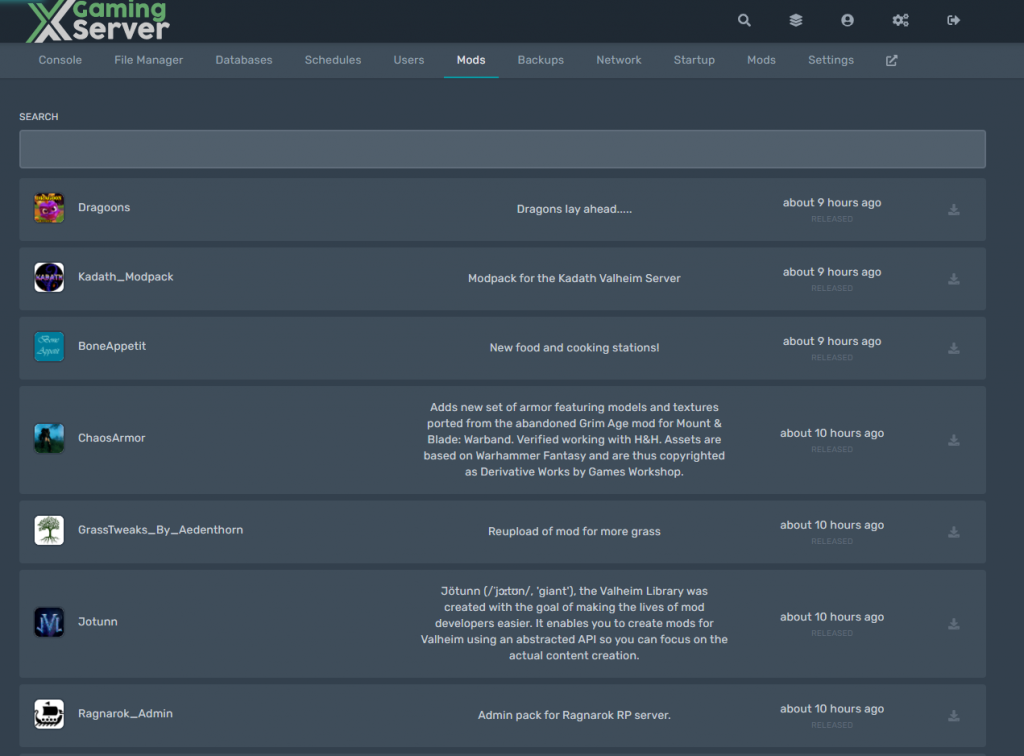
To install mods simply search and click install to the mod you like.
All mods come with Bepinex installed, therefore is no need to worry about installing bepinex.
Method 02:
Installing Mods to Valheim using BepInExPack for Valheim manually
BepInEx is a general purpose framework for Unity modding. BepInEx includes tools and libraries to
- load custom code (hereafter plugins) into the game on launch;
- patch in-game methods, classes and even entire assemblies without touching original game files;
- configure plugins and log game to desired outputs like console or file;
- manage plugin dependencies.
BepInExPack for Valheim contents
This pack is preconfigured and usable for Valheim modding.
In particular, the changes from base BepInEx releases are:
- Added preconfigured
BepInEx.cfgwith console enabled. - Added unstripped Unity + Mono BCL DLLs for current versions of the game. See this issue comment for more info.
- Updated Doorstop configuration and BepInEx to allow to load unstripped DLLs without having to overwrite game DLLs.
- Added scripts necessary to run both game and dedicated server on Linux machines
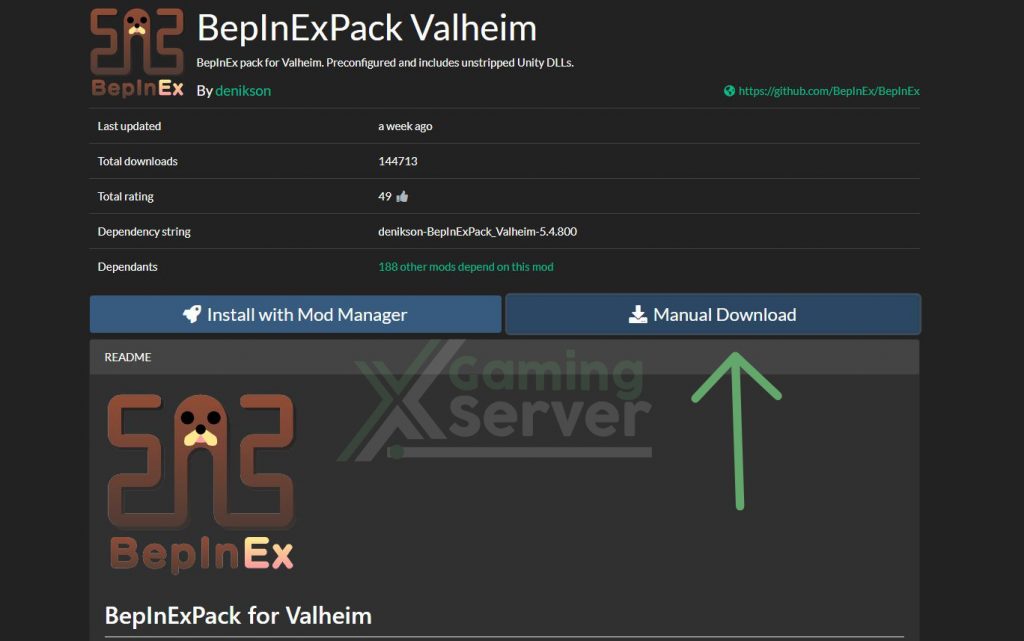
Installation for BeInExPack for Valheim Dedicated Server
To install BeInExPack the following
1. Login to your game panel.
After you place an order for your game server you’ll be sent login details to your server control panel.
2. Navigate to File Manager
On your game panel, navigate to File Manager tab, here you’ll see the game files.
3. Extract the archive into a folder.
Extract the archive into a folder. Do not extract into the game folder.
4. Upload Contents

Upload the contents of BepInExPack_Valheim folder into
<File Manager>/home/container 
Download the Mods and Upload to the Valheim Server
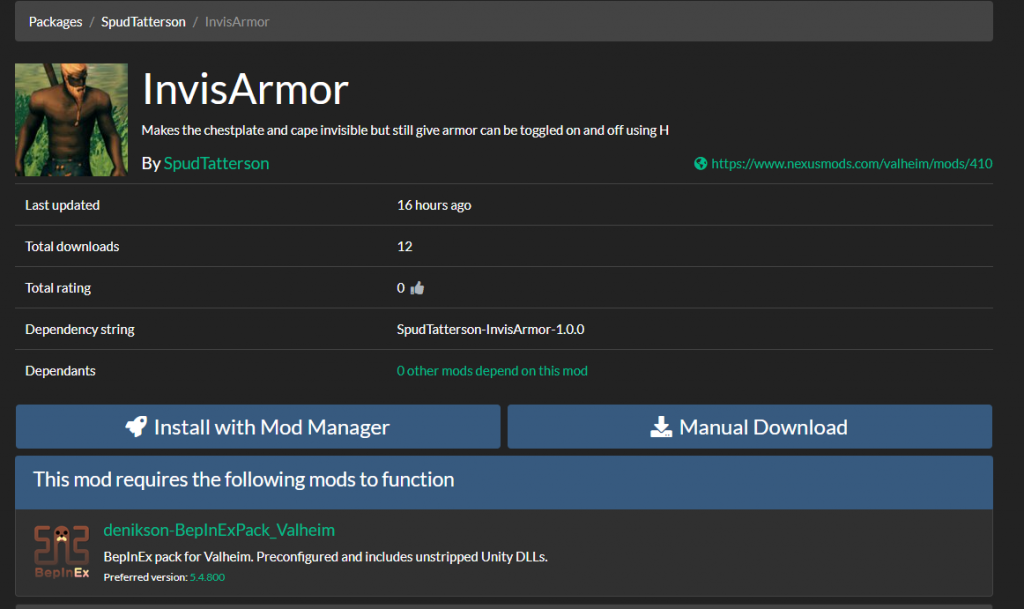
Now that you have install BeInExPack download your Mods and upload the mod files to
<File Manager>/home/container/BepInEx/plugins
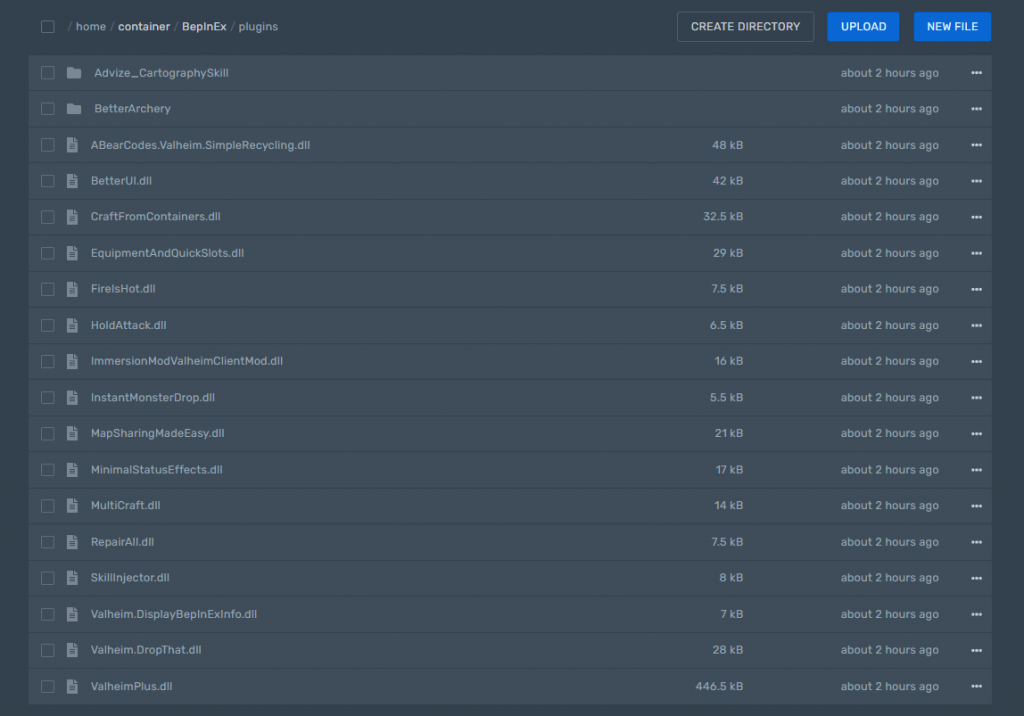
Reboot your Valheim Dedicated server
Checking BepInEx version and load status
If BepInEx was loaded successfully into the game, you should see BepInEx version info on the top left corner of the main menu:

Congratulations you have now installed BepInex on a Valheim game server now you can enjoy modding your game.
Method 03:
Installing Mods to Valheim using Valheim Plus Server.
Valheim Plus features on server
- Remove password requirement for the server.
- Modify the maximum amount of players on a server.
- Modify number of seconds it takes for items to despawn after being dropped on the ground. (default is 3600 seconds).
- Note: Items on ground will retain base game functionality which ensures that drops don’t disappear if a player is nearby or there is a “player base” nearby
- Automatically sync V+ configuration of players joining a server to match the server’s configuration.
For more Valheim Plus features you can check out here.
Valheim Plus Server Installation
When Placing an order simply select Valheim Plus mod.
If you already bought a server please open a ticket and we’ll installed a Valheim Plus modded server for you

Valheim Plus Server Config
To open the configuration file you have to open the “Configs” page in the game server interface, where you can see the “ValheimPlus: valheim_plus.cfg“. This can be opened via the blue icon which is located next to the configuration file.

A list of all commands that can be used in the configuration file can be found here
Bonus:
How to Install mods on your valheim client using Mod Manager
Thunderstore_Mod_Manager
Visit Overwolf to download Thunderstore Mod Manager
Thunderstore Mod Manager is an application for managing and downloading mods to games such as Valheim, Risk of Rain 2, Dyson Sphere Program, and GTFO.
The mods are synced directly from https://thunderstore.io and you can easily install and, diable and uninstall mods on your game
The mods are sourced from https://thunderstore.io/
Features
- Support for Valheim, Risk of Rain 2, Dyson Sphere Program, and GTFO
- A clean user interface designed to make modding as simple as possible.
- Safer mod installs allowing you to play the game through Steam normally.
- Mod profiles to switch between different sets of mods quickly and easily.
- Export profiles to easily share both your mods and configs with friends.
- Download and install mods directly from the manager.
- Launch Valheim Modded or unmodded
- View and update any outdated mods.
- Edit mod configurations directly from the manager.
- Manager auto-updates.
What is a mod manager?
It’s quite simple really, a mod manager is an application to make it easier to control which mods you have installed.
You can choose to update, enable/disable or even uninstall mods with a simple click, all whilst keeping it available on another profile.
Steps to install Mods on your Local game or dedicated server
Download and install Thunderstore Mod Manager
After installing, select the game/Server you want to mod,here is Valheim in our case
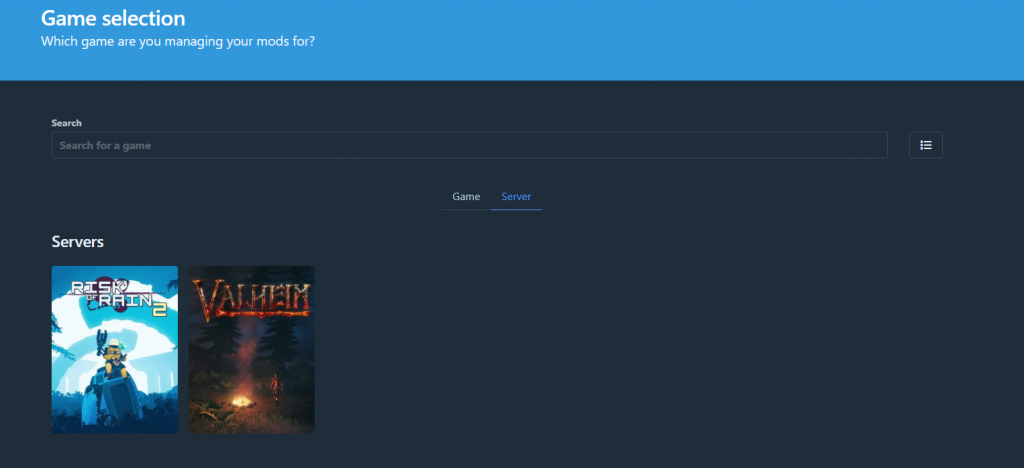
Chhose and select profile. Here you can Start valheim etithe rin modded or vanilla mod with just a click of the button
You can select the mods you have installed and disable them in one click
You can search the Valheim mods and install them with a click

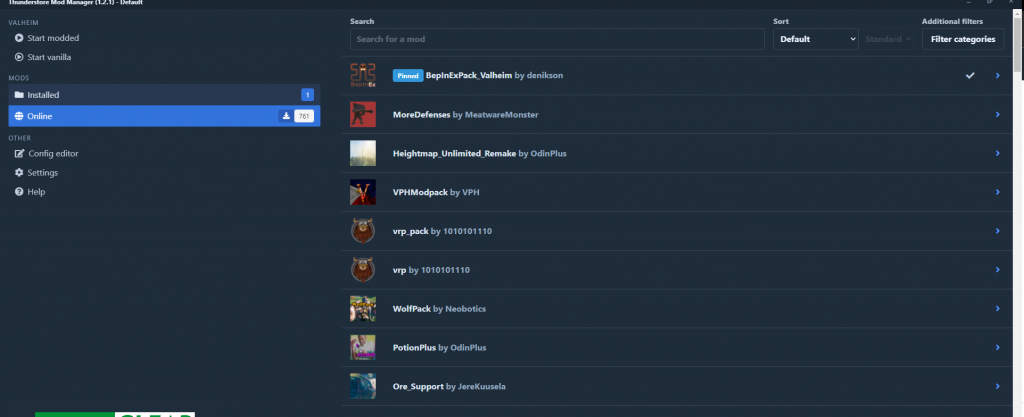
When using a rented Valheim game server. Make sure you have installed the same mods on the server too for the game to work.
Happy modding your Valheim server


5 comments