Shields are the most misunderstood gear slot in Valheim. Players obsess over weapons and armor, then die in the Swamp because they never learned that a 16-armor Bronze buckler with a perfectly timed parry can out-survive a 52-armor Iron tower shield that simply soaks hits. This guide breaks down every shield in the current Early-Access live build, the exact mechanics that separate the two shield families, and the single best shield to carry through each biome from Meadows to the Ashlands.
If you are running a multiplayer world where everyone is learning blocking together, hosting it on a proper always-on Valheim machine keeps the world progressing while you grind that Blocking skill. Now, the shields.
The Two Shield Families: Block vs Parry
Every shield in Valheim falls into one of two playstyles, and choosing the wrong family for your build is the most common mistake new players make. The split comes down to whether you intend to absorb damage or punish it.
Standard block: Round shields and Tower shields
Round shields and Tower shields absorb damage through raw Block armor. Tower shields sit at the top of the raw block charts — the highest block armor and highest block force in the game — but they pay for it. A Tower shield cannot parry at all, and it imposes a -10% movement penalty (you will see secondary sites claim -20%; the in-game value is -10%, so trust that). Round shields are the balanced middle ground: solid block armor, a usable 1.5× parry, and only a -5% movement hit.
Parry-oriented: Bucklers
Bucklers have the lowest raw block armor in their tier but the highest parry bonus in the game at 2.5×. They are light, carry only a -5% movement penalty, and reward players who can read enemy attack windups. A buckler is not a “weaker shield” — it is a different weapon entirely. When you parry, that 2.5× multiplier turns a modest block armor number into a stagger-inducing wall, and a staggered enemy takes massively increased damage from your follow-up swing.
How Blocking Actually Works (The Mechanics)
To pick the right shield you need to understand the four numbers the game tracks behind the scenes. These come straight from the Blocking and Shields mechanics, and they govern every defensive interaction in the game.
- Block armor — the first reduction step. It subtracts from incoming damage using the shield’s armor plus any resistances. Higher block armor means more of the hit is eaten before it reaches you.
- Block force — the knockback applied to the attacker on a successful block. Crucially, block force scales 50% → 100% based on the block armor used, so a heavier block both absorbs more and shoves the enemy back harder.
- Parry — triggered when you block less than 0.25 seconds before the hit lands. A parry multiplies the shield’s block armor by its parry bonus and staggers the attacker, opening them up for a punishing counter.
- Parry bonus — the multiplier applied on a successful parry. This is where the families diverge hard (see table below).
Parry timing: the 0.25-second window
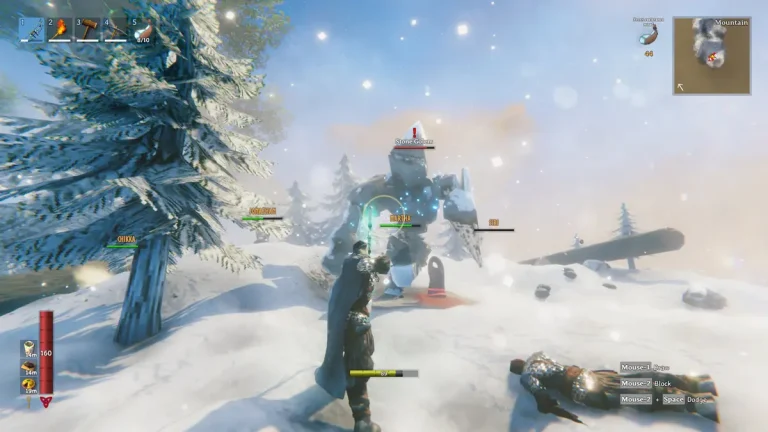
The single most important number for combat survival is the 0.25-second parry window. You do not hold block early and wait — you tap block just as the enemy’s swing is about to connect. Block too early and it counts as a normal block (no stagger). Block in that final quarter-second and the parry fires, applying the full multiplier and staggering the attacker. This is muscle memory: practice on weak Greylings in the Black Forest until the timing is automatic before you take a buckler into the Swamp.
Parry bonus by weapon and shield
One nuance that confuses many players: when a shield is equipped, the shield’s block power and parry bonus replace the weapon’s for the purpose of blocking. The weapon parry values below matter only when you are blocking with a weapon (no shield equipped).
| Block source | Parry bonus |
|---|---|
| Flesh rippers (fists) | 6× |
| Knives | 4× |
| Bucklers | 2.5× |
| Axes / Clubs / Pickaxes / Polearms / Spears / Swords | 2× |
| Round shields | 1.5× |
| Bows / Tankard / Ooze bomb | 1.5× |
| Tower shields | Cannot parry |
How the Blocking skill scales your defense
Your Blocking skill is the hidden multiplier on everything above. It grants +0.5% block armor per level, reaching +50% at level 100. Because parry scales off block armor, a higher Blocking skill simultaneously raises your raw block power and your parry capacity, while indirectly lowering the stamina drain on each block. This is why a veteran with a low-tier shield often tanks better than a fresh character with a high-tier one — the skill is doing the heavy lifting. You level Blocking by blocking and parrying, so do not shy away from taking hits early.
Every Shield Ranked: The Full Stat Table
Here is every shield in the current live version with its verified block armor, block force, parry bonus, and movement penalty. Block armor and block force are shown as base / max-upgraded — the lower number is the freshly crafted item, the higher number is fully upgraded at the appropriate forge level. Where only one number appears, the values do not change with upgrades.
| Shield | Family | Block armor | Block force | Parry | Move |
|---|---|---|---|---|---|
| Wood shield | Round | 6 / 18 | 20 / 30 | 1.5× | -5% |
| Wood tower shield | Tower | 10 / 22 | 100 / 110 | — | -10% |
| Bronze buckler | Buckler | 16 / 28 | 30 | 2.5× | -5% |
| Banded shield | Round | 42 / 54 | 40 / 50 | 1.5× | -5% |
| Iron buckler | Buckler | 28 / 40 | 30 | 2.5× | -5% |
| Iron tower shield | Tower | 52 / 64 | 100 / 110 | — | -10% |
| Silver shield | Round | 60 / 72 | 40 / 50 | 1.5× | -5% |
| Serpent-scale shield | Tower | 60 / 72 | 100 / 110 | — | -10% |
| Black metal shield | Round | 78 / 90 | 50 / 60 | 1.5× | -5% |
| Black metal tower shield | Tower | 104 / 116 | 150 / 160 | — | -10% |
| Carapace buckler | Buckler | 78 / 90 | 50 / 60 | 2.5× | -5% |
| Carapace shield | Round | 96 / 108 | 60 / 70 | 1.5× | -5% |
| Flametal shield | Round | 114 / 126 | 50 / 60 | 1.5× | -5% |
| Flametal tower shield | Tower | 140 / 152 | 150 / 160 | — | -10% |
A few notes on the lineup. There is no plain “wood buckler” — the earliest buckler you can craft is the Bronze buckler, which is your first real parry tool. Likewise, the basic early round shield is simply the Wood shield; there is no separate generic “Round shield” item. On durability and weight: bucklers are by far the lightest shields and tower shields the heaviest, but exact per-shield durability and weight figures should be verified on each shield’s page before you quote them — describe them by feel, not by number.
Best Shield Per Biome / Progression Tier
Raw stats only tell half the story. The right shield depends on the biome you are fighting in and whether you prefer to parry or to tank. Here is the role-based recommendation for each tier.
Meadows & Black Forest (early game)
Start with the Wood shield as your general-purpose blocker — cheap, light, and good enough for Greylings and the first boss. As soon as you reach bronze, craft the Bronze buckler if you want to learn parrying early. Its 2.5× bonus makes Black Forest enemies trivial once you nail the timing, and it sets up the muscle memory you will rely on for the rest of the game.
Swamp (iron tier)
The Swamp is where shields earn their keep against Draugr and Abominations. Choose based on style: the Iron buckler for parry players (28/40 armor at 2.5× is a brutal counter), the Banded shield for a balanced general-purpose round shield, or the Iron tower shield when you want to plant your feet and tank a swarm with no parry risk.
Mountains (silver tier)
The Silver shield is the all-rounder here. If you are facing Serpents on the ocean crossing or want maximum raw block with no parry, the Serpent-scale shield (crafted from Serpent scales) is a tower-class wall — high block armor and force, but no parry.
Plains (black metal tier)
Against Fulings and Deathsquitos, parrying is king because a stagger lets you delete them before they swarm. The Carapace buckler (note: Plains-accessible parry option) or the Black metal shield covers most players. For pure tanking, the Black metal tower shield jumps to 104/116 block armor and 150/160 force — a genuine fortress.
Mistlands (carapace tier)
The Carapace shield (96/108 round) and Carapace buckler (78/90 at 2.5× parry) are the endgame parry/block pairing for Seekers and Gjall. The buckler’s parry stagger is invaluable against fast Seeker soldiers.
Ashlands (flametal tier — top of the live game)
The Ashlands brings the strongest shields in the current Early-Access build. The Flametal shield (114/126) is the highest-block-armor round shield with a usable 1.5× parry, while the Flametal tower shield (140/152 armor, 150/160 force) is the single highest overall block in the game for players who want to soak everything the Ashlands throws at them with no parry timing required.
Practical Loadout Advice
- Two playstyles, two shields. Keep a buckler and a round/tower shield in your toolbar. Parry single tough enemies; switch to a tower shield to tank swarms or ranged barrages.
- Grind Blocking early. The +50% block armor at level 100 effectively upgrades every shield you own. Block on purpose, not just in panic.
- Upgrade before you out-tier. A fully upgraded lower-tier shield often matches a base higher-tier one in block force — and block force scales your knockback.
- Tower shields and stamina. The -10% movement and no-parry tradeoff means tower shields drain stamina on every block with no payoff window. Use them deliberately, not as a default.
For the full crafting-station and upgrade requirements, our Valheim server documentation covers the workbench and forge progression. And if you want to test parry timing safely without losing gear, you can practice in a creative-mode world using the spawn commands in our Valheim console commands and item prefab guide — just remember those dev commands only work in singleplayer or listen-server, not on a vanilla dedicated server.
Frequently Asked Questions
What is the best shield in Valheim overall?
For raw defense in the current live version, the Flametal tower shield is the strongest, with 140/152 block armor and 150/160 block force — but it cannot parry and slows you 10%. For an aggressive, skill-based player the best shield is a high-tier buckler like the Carapace buckler (78/90 armor) or Flametal-tier round options, because the 2.5× parry bonus and stagger lets you kill faster than you could ever tank. There is no single “best” — it depends on whether you parry or absorb.
Buckler vs round shield — which should I use?
Use a buckler if you can reliably hit the 0.25-second parry window: its 2.5× parry bonus far outperforms a round shield’s 1.5×, staggering enemies for huge counter damage. Use a round shield if you prefer steady blocking over precise timing — it has much higher base block armor than a same-tier buckler, so even a sloppy block absorbs more. Bucklers reward skill; round shields reward consistency.
How does the parry bonus work and what is the parry timing?
A parry fires when you block within the final 0.25 seconds before a hit lands. On a successful parry, the game multiplies your shield’s block armor by its parry bonus (2.5× for bucklers, 1.5× for round shields) and staggers the attacker. Block earlier than that window and it counts as a normal block with no stagger. Tower shields have no parry bonus, so they can never parry no matter your timing.
Does the Blocking skill increase shield strength?
Yes. The Blocking skill grants +0.5% block armor per level, up to +50% at level 100. Because parry damage and stagger scale off block armor, leveling Blocking improves both your normal blocks and your parries, and it reduces the stamina cost of blocking. Level it by blocking and parrying frequently — a high Blocking skill can make a mid-tier shield outperform a fresh higher-tier one.
What is block force in Valheim?
Block force is the knockback applied to the attacker when you successfully block. It scales from 50% to 100% based on the block armor used in that block, and it is dramatically higher on tower shields (100–160) than on bucklers (30) or round shields (20–70). High block force is what lets tower shields shove enemies back and create breathing room, even though they cannot parry.
Why do tower shields slow you down so much?
Tower shields impose a -10% movement penalty (not -20%, despite some outdated guides) as the cost of their top-tier block armor and force. Bucklers and round shields only cost -5%. The movement hit, combined with the inability to parry, means tower shields are best for stationary tanking against swarms or ranged attacks rather than mobile combat.
Learning to parry transforms Valheim combat, but it transforms multiplayer combat even more — a coordinated group where everyone parries and counters can take down bosses far above their gear tier. If you are running a shared world, see our guide on dedicated vs slot-based Valheim hosting to make sure your server has the CPU clock and RAM to keep combat responsive, and our guide to fixing Valheim lag and desync if rubber-banding is throwing off your parry timing.
Ready to play?
Run your own Valheim 1.0 server with XGamingServer
Spin up an always-on Valheim 1.0 server your friends can join in minutes — no port-forwarding, no tech headaches.