
In this article, we will guide you through the process of disabling the auto-update feature on your SOTF server, empowering you to determine when and how updates are applied!
How to disable the auto-update feature?
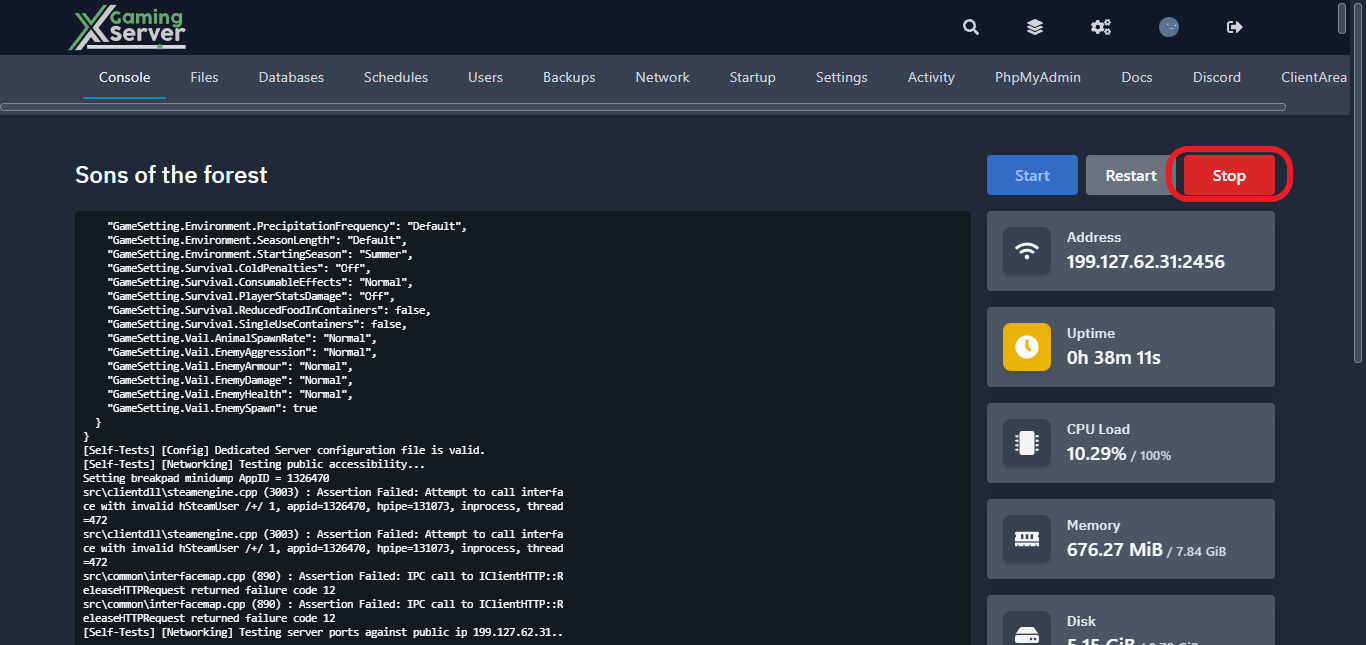
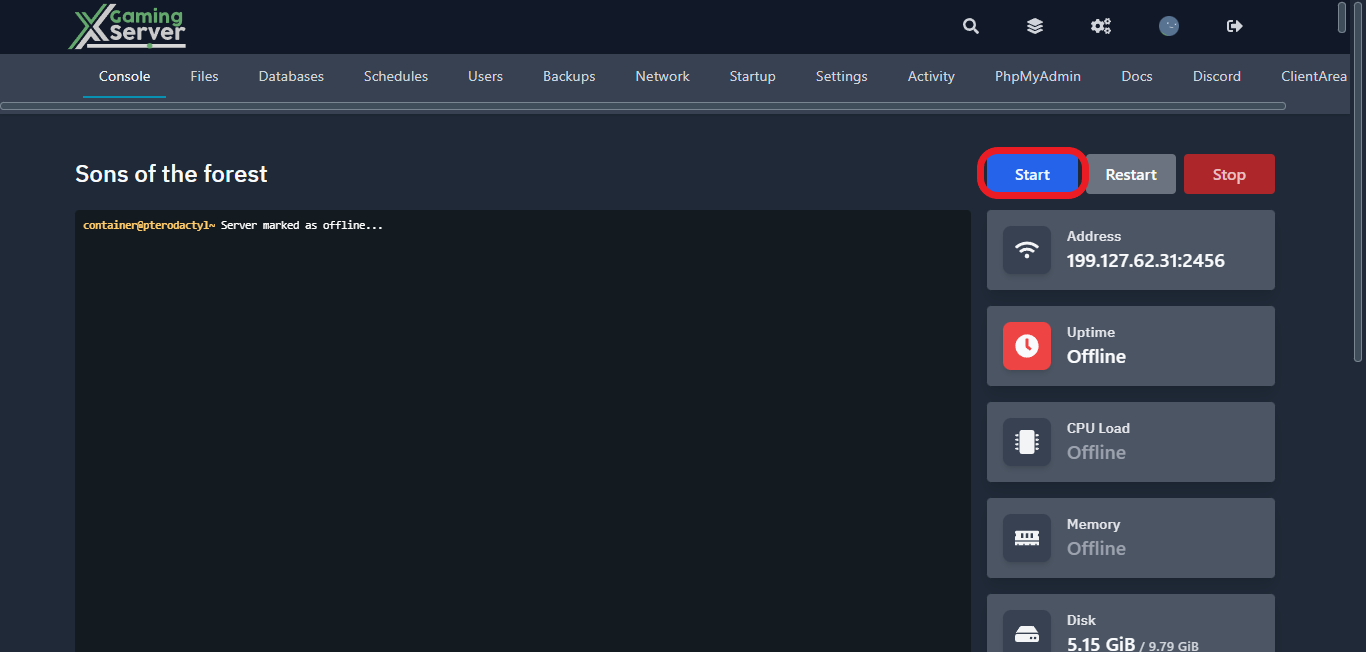
1- Go to your server’s control panel and hit “Stop” to stop your server
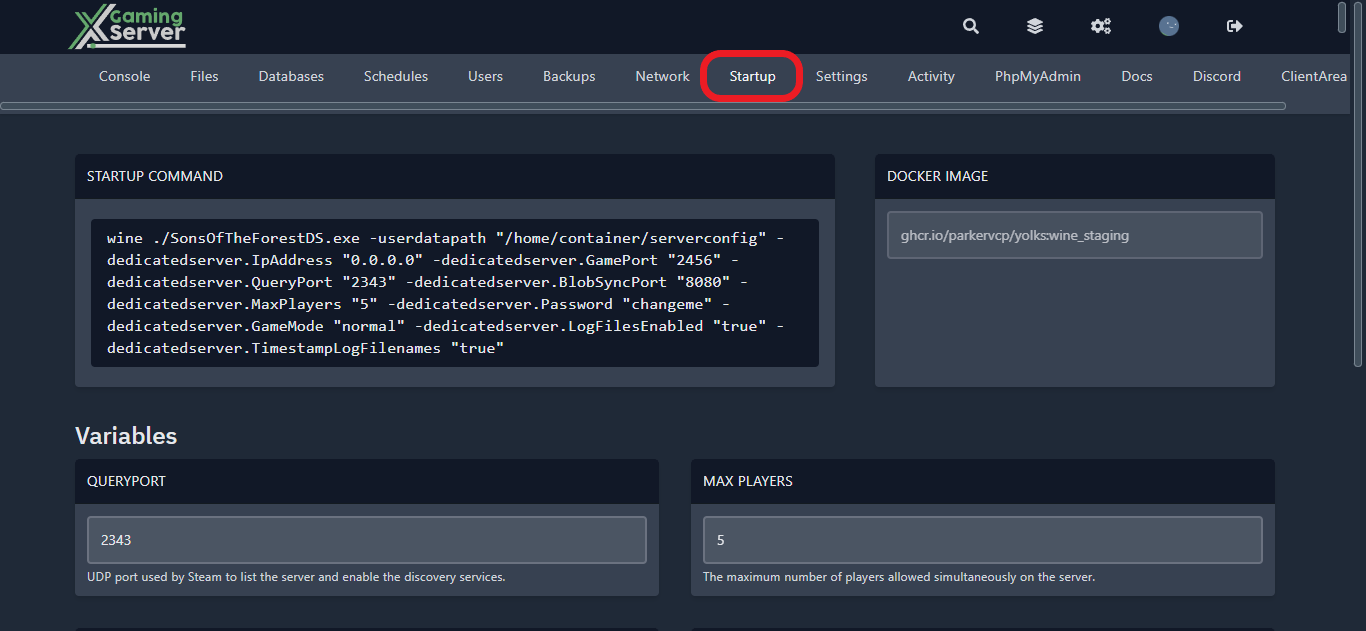
2- Navigate to the “Startup” tab
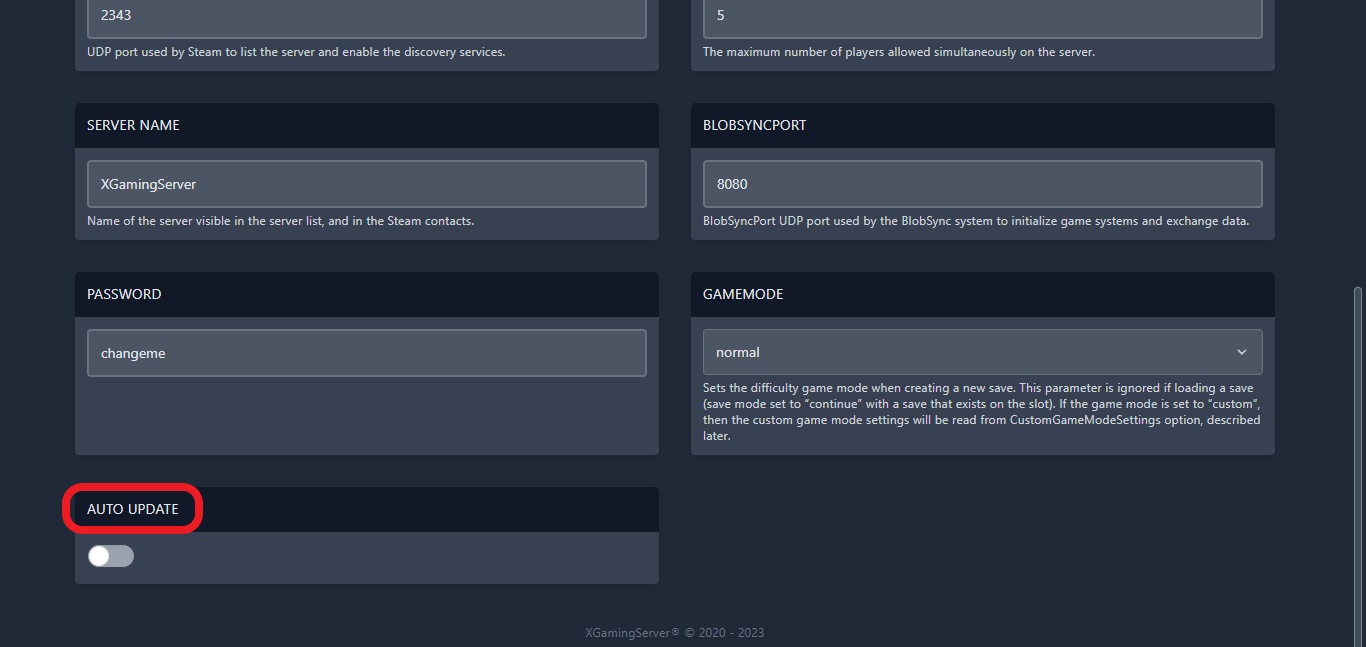
3- Search for “AUTO UPDATE” then turn it of
4- Go back to the “Console” tab and hit “Start” to start your server
If you need any help with your service don’t hesitate to contact us through our support tickets at https://billing.xgamingserver.com/submitticket.php