How To Upload an Existing World to 7 Days to Die server

In this guide, we will show you how to upload an existing world to your 7 Days to Die server.

This method will transfer all of your progress from your single player world. You should also know that this works only for generation maps.

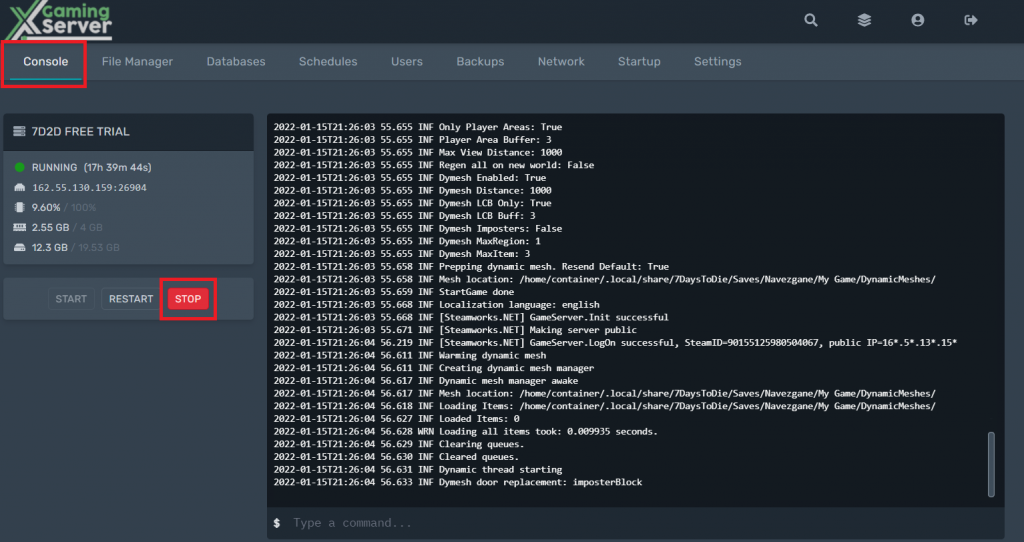
First of all, we need to stop the server.

Stop the server
Stop the server

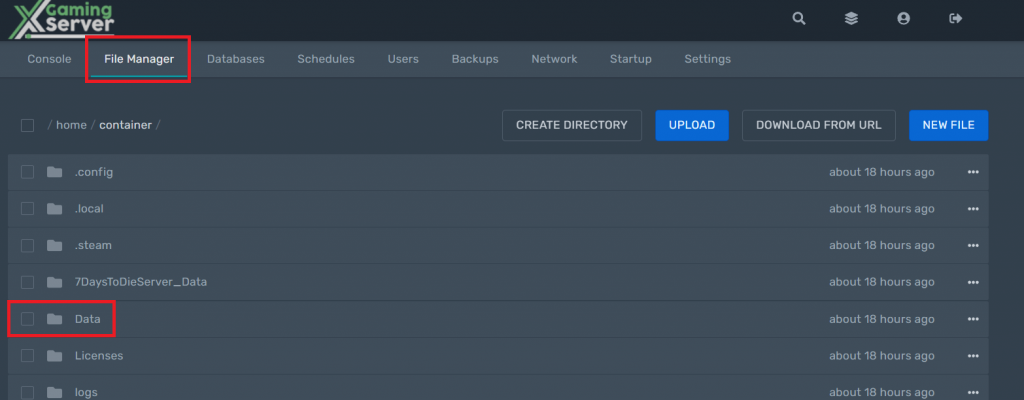
To upload an existing world to your 7 Days to Die server, open your server control panel and navigate to the file manager section.

File Manager
File Manager

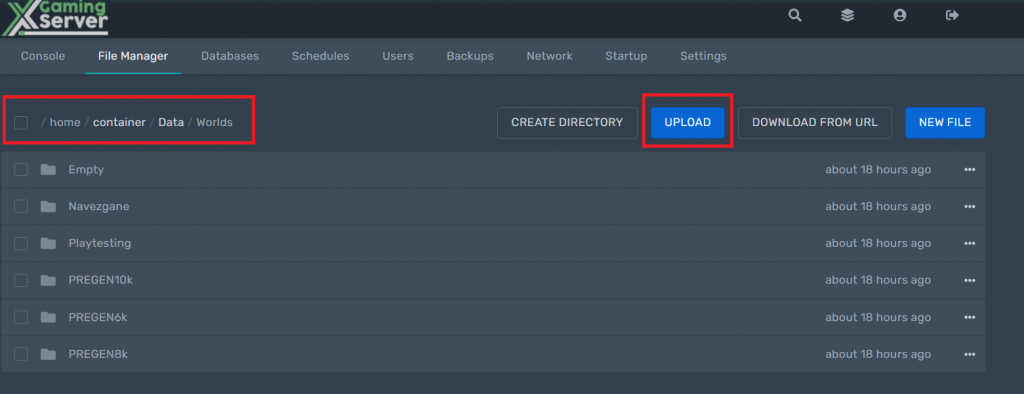
Then, open the Data/Worlds directory and upload your map.

Upload your map
Upload your map

Now, open the serverconfig.xml file and change the “GameWorld” value to your map name.

GameWorld value
GameWorld value

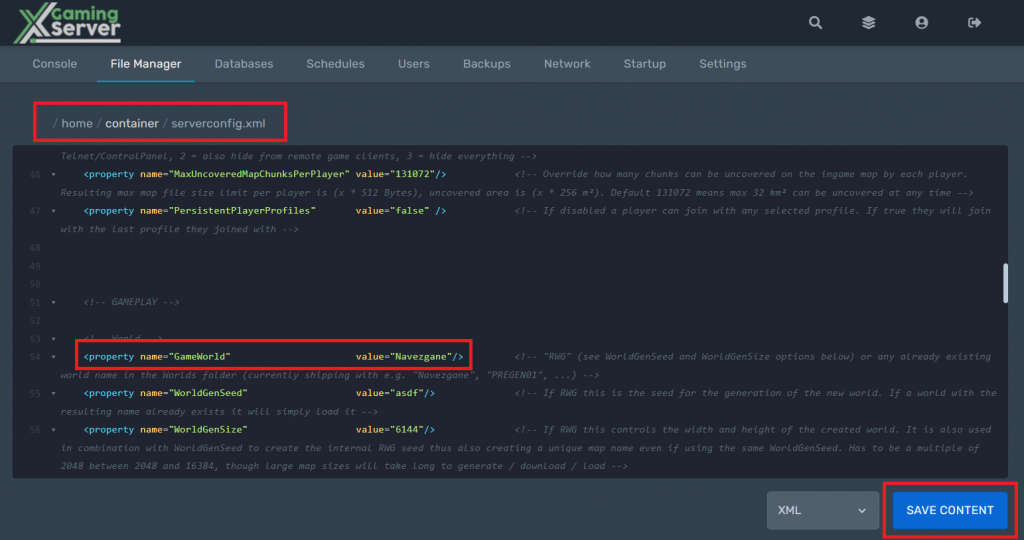
Click the save button, start your server in the console section and your single player world should be loaded on your server.

Ready to play?

Run your own 7 Days to Die server with XGamingServer

Spin up an always-on 7 Days to Die server your friends can join in minutes — no port-forwarding, no tech headaches.

99.9%Uptime SLA
< 5 minInstant setup
24/7Human support
DDoSProtected
Instant setup Your server is live in minutes with a one-click control panel.
Mods & plugins Install mods, plugins and workshop content in a few clicks.
DDoS protected Enterprise DDoS mitigation keeps your server online 24/7.
Low-latency hardware Premium CPUs & NVMe SSDs for lag-free multiplayer.
Free backups Automatic backups so your world is never lost.
Real human support Gamers helping gamers — 24/7, no bots, no scripts.

Pick your 7 Days to Die plan & play in minutes

See all plans
Starter $8.40/mo 4 GB RAM Renews $12/mo Buy now
Rookie $17.50/mo 8 GB RAM Renews $25/mo Buy now
Pro $24.50/mo 12 GB RAM Renews $35/mo Buy now