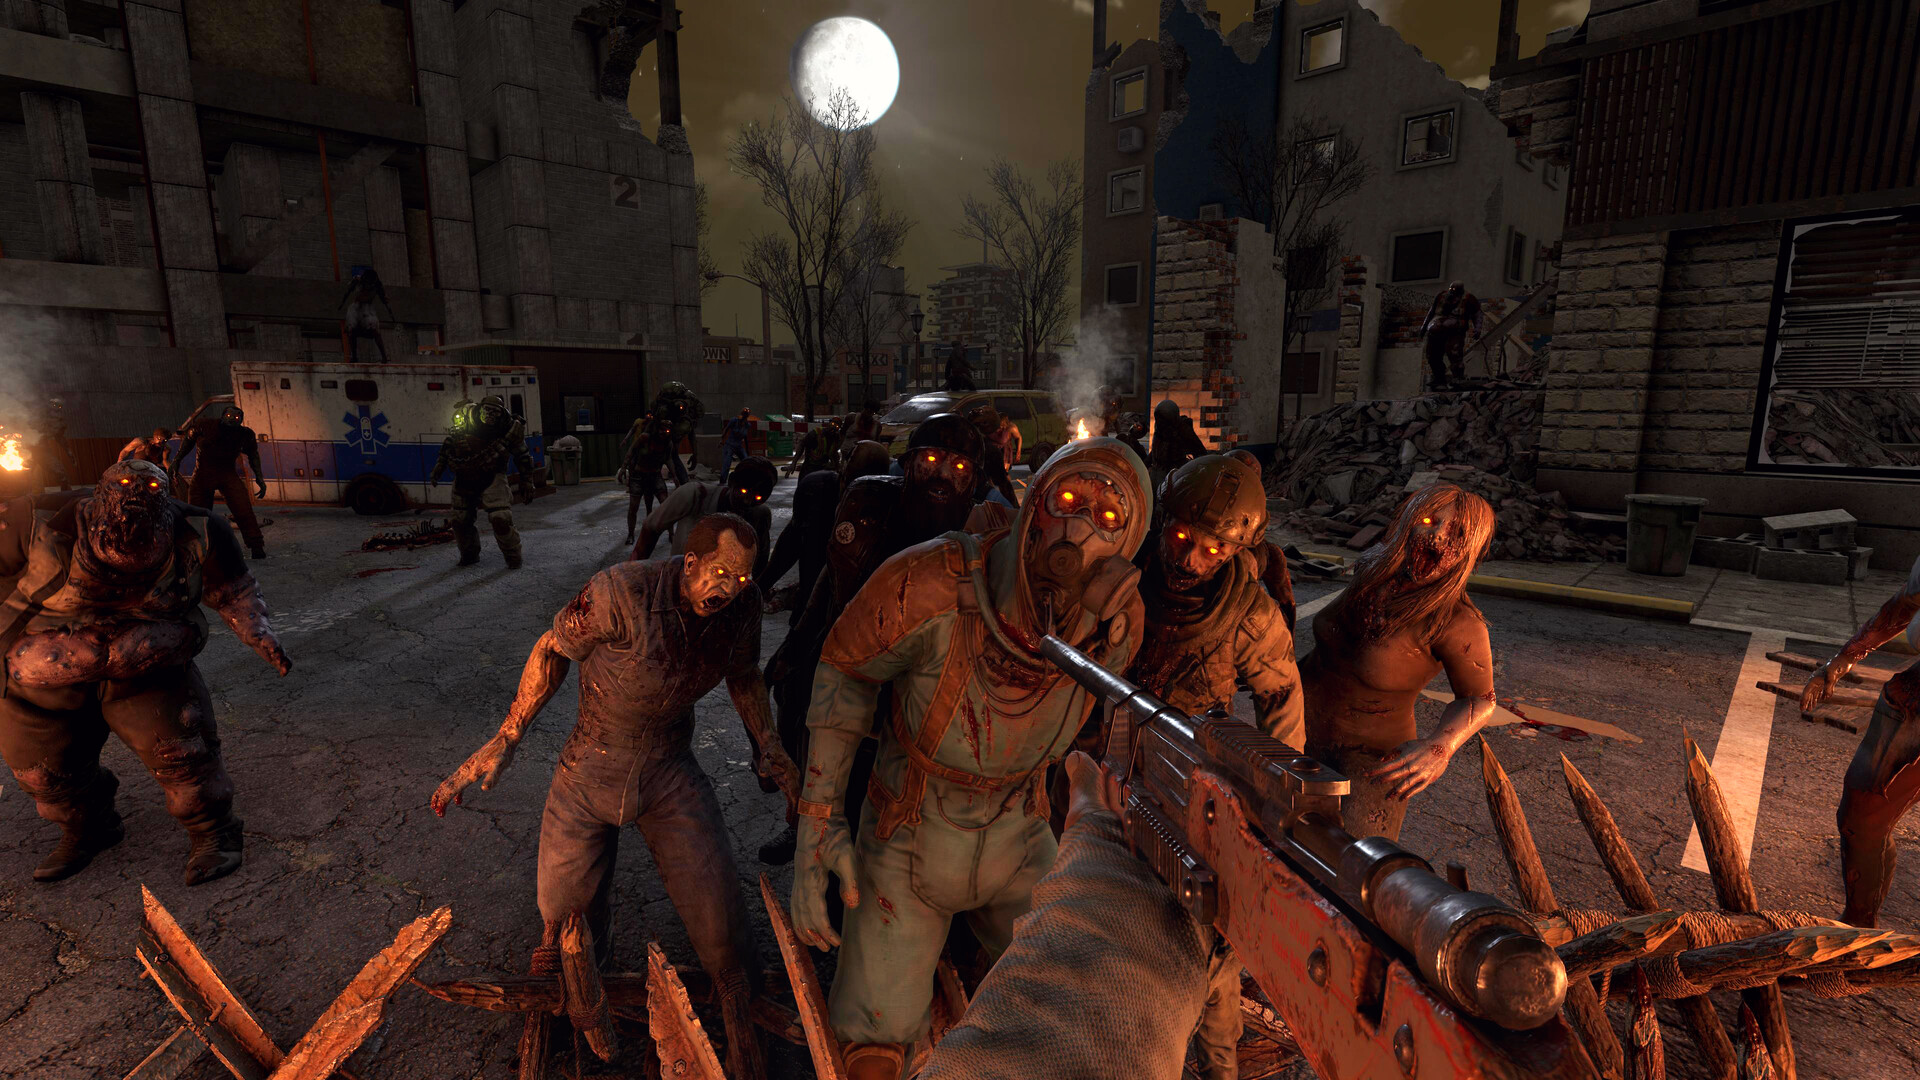
The Blood Moon is the heartbeat of 7 Days to Die. On default settings it arrives every 7th day, and the official wiki is blunt about what you are up against: the horde “knows exactly where all players are” no matter how quiet you are, how many walls you hide behind, or how deep you dig. Those zombies will break, climb, or tunnel straight toward you. A good horde base does not hide from that fact, it weaponizes it, funneling the swarm into a place where your traps and weapons do the work. This guide covers the core designs that actually hold up under the spawns, with every mechanic checked against the official wiki.
How the Blood Moon Horde Works
At 08:00 on a horde day the day number in your HUD turns red. That is your warning to finish prepping. The horde itself starts at 22:00 and ends at 04:00 the following morning, so you are defending for roughly six in-game hours. The number and strength of the waves you face is determined by your Game Stage, the number of players in the session, and your game settings (such as Blood Moon enemy count). This is why a base that carried you through Day 7 can crumble on Day 28: the horde scales up with you, throwing tougher and more numerous zombies as your Game Stage climbs.
Because the zombies always pathfind to your exact position, your job is to control where they approach from. Every design below is built around that single idea.
Separate Your Horde Base From Your Main Base
The first rule is to keep your living base and your fighting base apart. Your main base is where you store loot, run your forge, farm, and craft. If the horde targets that, a single collapse or breach can wipe your progress. Build a dedicated horde base a short distance away and stand in it when night falls so the swarm pathfinds to the kill zone, not to your supplies. The two only need to be close enough that you can sprint or ride a vehicle between them. Keeping them separate also means a failed trap design costs you a rebuild, not your entire run.
Structural Integrity: Why Bases Collapse
Understanding structural integrity is the difference between a base that holds and a base that drops out from under you. Each block has a Mass value and support stats. According to the wiki, a block that is both vertically supported and capable of providing vertical support can hold an effectively unlimited column of blocks stacked directly above it. Horizontal support is the catch: it is applied per face and is limited by the block’s material. When you cantilever blocks sideways past that limit, the wiki is explicit that all blocks attached to that overloaded face collapse at once.
The practical takeaways: build vertically and keep your fighting platform supported by columns running to the ground rather than long unsupported overhangs. Upgrade your support blocks to sturdier materials (the horizontal support stat scales with material), and remember that demolitions and explosive-style zombies can knock out a support pillar and bring an overhang down. Avoid floating platforms held up by a single thin connection.
Core Horde Base Concepts
Kill Corridors
A kill corridor forces the horde to walk single-file down a long, narrow lane toward you. Because the zombies pathfind directly to your position, you place yourself at the end of the corridor (often behind bars or a small gap) so they line up. This is the ideal shape for the Dart Trap, which the wiki describes as firing Iron Darts in a straight line one projectile per second, making it most effective when zombies are funneled down a long lane. A corridor also lets you melee or shoot a packed line of enemies instead of a 360-degree swarm.
Drop Bases and Elevation
Elevation is one of the strongest defensive tools you have because the horde has to climb to reach you, slowing them and bunching them up. A drop base extends this idea: you stand on a raised platform and route zombies across a path that drops them into a pit. The fall does the damage, and survivors at the bottom can be finished off or left to traps. This is why grain silos and similar tall points of interest are good early-game horde spots, since the height alone buys you time to pick zombies off one by one.
Traps: Verified Specs
Electrical traps need power, so plan a generator bank or solar setup with enough wattage and wiring to your traps. Here are the verified figures from the official wiki for the staple defensive traps.
| Trap | Power | Effect | Notes |
|---|---|---|---|
| Blade Trap | 20 W | Spinning blades hit everything in a 3×3 tile area; 20 entity damage | 2000 durability, loses 4 per hit, stops working at 500 durability |
| Dart Trap | Electric (powered) | Fires Iron Darts in a straight line, ~1 per second | Best down a long kill corridor; needs Iron Dart ammo |
| Electric Fence Post | 5 W | Applies the Shocked status to anything touching the live wire | Posts can span up to ~14 blocks apart; immobilizes zombies, slows players |
The Electric Fence Post is a control tool, not a killer. The wiki notes it immobilizes zombies for the duration of the Shocked effect while only slowing players, and that the post at the receiving end of the current takes durability damage as it shocks. That makes fences perfect for holding a line in place while your Blade Traps and weapons grind them down. Layer them: fences to stall, blades to chew, darts down the corridor for reach.
One 1.0 caveat: traps do not award you XP for kills unless you have at least 3 points in the Advanced Engineering perk (up to roughly 50% XP at max). If you want your defenses to also level you, invest there.
Unlocking Traps in 1.0
Since 1.0, the old buy-with-skill-points system is gone, replaced by Learn by Reading. You unlock and improve trap recipes by finding and reading Electrical Traps crafting magazines, with higher tiers gated behind reading more of them. The Advanced Engineering perk (under Intellect) still matters: leveling it reduces the crafting cost of traps and raises your loot chance for the relevant magazines. So a strong horde-base build is part construction, part magazine grind, part perk investment.
Frequently Asked Questions
Can zombies just dig under my horde base?
Yes. The wiki confirms Blood Moon zombies will break obstacles, climb, and dig to reach you, and they always know your exact location. You cannot wall them out passively, you have to give them a path you control and defend it.
Why did my base collapse even though the zombies barely touched it?
Almost always overloaded horizontal support. Each block face can only hold a limited mass based on its material, and exceeding that drops every block attached to the face at once. Keep platforms on grounded support columns rather than long unsupported overhangs.
Do I need electricity for a horde base?
Not strictly, since drop bases and melee corridors work without power. But the strongest setups use powered Blade Traps (20 W), Dart Traps, and Electric Fence Posts (5 W), so a generator or solar bank with proper wiring dramatically increases what one player can hold off.
Bringing It Together
The winning formula is consistent: separate your horde base from your home, build vertically with grounded support to respect structural integrity, funnel the swarm into a kill corridor or drop, and layer electric fences to stall while blades and darts deal damage. Tune your defenses to your Game Stage, because the horde grows with you. For more on the supporting systems, see our base building guide on blocks, upgrades and integrity, the best base locations and POIs, and the magazines guide for unlocking your trap tiers faster.
Blood Moon nights are far more fun with company, and defending a shared kill corridor with friends on your own always-on 7 Days to Die server means your base, traps, and magazine progress persist between sessions. If you need a hand wiring power or configuring difficulty, our 7 Days to Die setup documentation walks through it step by step.
Related: plan for the horde with the Zombies & Animals Database (HP + XP per enemy).
Ready to play?
Run your own 7 Days to Die server with XGamingServer
Spin up an always-on 7 Days to Die server your friends can join in minutes — no port-forwarding, no tech headaches.