Your drop-pod hits the surface, ADA starts talking, and suddenly you are alone on an alien planet with a handful of tools and a vague mandate to build a factory. Satisfactory’s opening hours can feel overwhelming, but the early game follows a clear rhythm: complete a few starter objectives, hand-craft your first parts, then hand the boring work over to machines. This guide walks through what to do in your first few hours, the early milestones that matter, and the beginner mistakes that quietly slow everyone down.
Your First Objectives: ADA, the HUB, and Onboarding
After the drop-pod lands, ADA walks you through a short Onboarding tutorial that teaches the core loop. Your very first job is to build The HUB (the Habitat and Utility Base), which costs 20 Iron Ore to construct. The HUB starts as little more than a Craft Bench and a terminal, and everything in the opening tier flows through it.
The HUB upgrades are Tier 0 Milestones, and unlike later tiers they must be completed in sequential order. Each upgrade asks you to deliver parts to the HUB terminal and unlocks new buildings in return. Early upgrades hand you the Portable Miner, the Smelter and your first Biomass Burner, then the Constructor and Power Poles. Completing all of Tier 0 unlocks Tiers 1 and 2 at once, which is your real entry into automation.
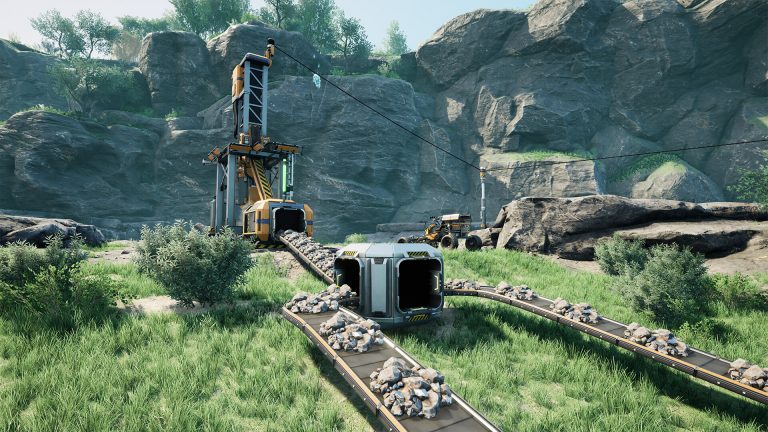
To gather those first parts you will mine ore by hand. Equip a Portable Miner on a resource node (it produces 20, 40, or 80 items per minute on impure, normal, and pure nodes respectively) or simply pick ore up by hand to get started, then feed it into the HUB or a Smelter.
From Hand-Crafting to Automation
At the start you craft everything yourself at the Craft Bench by holding the craft button (you can tap Space to keep it held so you are not clicking endlessly). The Equipment Workshop handles manually-crafted gear, ammunition and consumables, including the Xeno-Zapper you start with and the Portable Miner unlocked at the first HUB upgrade. Hand-crafting is fine for the very first parts, but it does not scale, and that is the whole point of the game.
The transition you are aiming for is: Miner to Smelter to Constructor to storage, connected by conveyor belts so the machines run while you do something else. A Miner Mk.1 on a normal-purity node extracts 60 Iron Ore per minute (30 on impure, 120 on pure nodes); a Smelter consumes 30 Iron Ore per minute and outputs 30 Iron Ingots per minute, so one Miner on a normal node can feed two Smelters. Pipe those ingots into a Constructor and you have your first automated production line.
The Constructor turns one part into another and draws 4 MW of power. The base recipes you will lean on constantly are below, all verified against the official wiki:
| Constructor recipe | Input | Output | Output rate |
|---|---|---|---|
| Iron Plate | 3 Iron Ingot | 2 Iron Plate | 20 / min |
| Iron Rod | 1 Iron Ingot | 1 Iron Rod | 15 / min |
| Screws | 1 Iron Rod | 4 Screws | 40 / min |
| Wire | 1 Copper Ingot | 2 Wire | 30 / min |
| Cable | 2 Wire | 1 Cable | 30 / min |
| Concrete | 3 Limestone | 1 Concrete | 15 / min |
Note the rate mismatches. One Smelter making 30 ingots per minute over-feeds an Iron Plate Constructor (which wants 30 ingots to run at 20 plates/min) but starves two of them. Belts matter too: the Conveyor Belt Mk.1 only moves 60 items per minute, so a single belt comfortably carries the output of one Smelter or one early Constructor. Do not expect a Mk.1 belt to handle a fully overclocked machine later.
Powering the Early Game with Biomass
Your first machines need power, and in Tier 0 through Tier 2 that means Biomass Burners. The HUB gains two small attached burners (from HUB Upgrades 2 and 5) that each produce 20 MW, but burn fuel about 1.5 times more slowly than a standalone burner, so they are just as fuel-efficient. A standalone Biomass Burner produces 30 MW at 100% clock speed.
Burners must be fed manually with leaves, wood, or refined Biomass and Solid Biofuel, which is tedious. The standard advice is to convert raw foliage into Biomass and then Solid Biofuel (which packs far more energy per item), and to rush Coal Power at Tier 3 so you can stop babysitting fuel entirely. Until then, keep a stack of biofuel on hand so your factory does not stall when you wander off to explore.
Common Beginner Mistakes
- Over-planning the first base. The official guidance is literally “Build, don’t Plan.” Your first factory will be conveyor spaghetti and most of it gets torn down anyway. Save serious layout work for the mid-game.
- Letting power run dry. If a Biomass Burner empties, connected machines stop. Stockpile Solid Biofuel and watch the power indicator.
- Mismatching belt and machine rates. A Mk.1 belt caps at 60 items/min; plan around it instead of wondering why a line is bottlenecked.
- Hand-crafting too long. Once you have the Smelter and Constructor, automate the boring parts rather than grinding them by hand.
- Wandering into danger early. Avoid the western high plateaus (Red Jungle / Red Bamboo) and the Swamp until much later; they hold radioactive deposits and tougher creatures.
What to Aim For Next
Once Tier 0 is done and Tiers 1 and 2 open up, your goals become the Tier Milestones, MAM research, and feeding the Space Elevator. The Space Elevator is the spine of progression: delivering its Project Assembly parts unlocks the higher tiers, and you need it to reach Tier 3 and beyond. If you want a deeper roadmap, see our progression guide covering milestones, tiers and the Space Elevator, and once you are placing belts in bulk, the logistics guide on belts, splitters and manifolds will save you a lot of headaches.
Frequently Asked Questions
What should I build first in Satisfactory?
Build the HUB (20 Iron Ore), then work through the Tier 0 HUB upgrades in order. These hand you the Portable Miner, Smelter, Biomass Burner and Constructor, which together let you set up your first automated Miner to Smelter to Constructor line.
How do I power my first machines?
Early on you rely on Biomass Burners fed with wood, leaves or Solid Biofuel. A standalone burner makes 30 MW. Convert foliage into Solid Biofuel for less micromanagement, then move to Coal Power around Tier 3.
When should I stop hand-crafting and automate?
As soon as you unlock the Smelter and Constructor in Tier 0. Hand-crafting is fine for your very first parts, but automation is the core of the game and the only way to keep up with milestone and Space Elevator demands.
The early game is far more fun with company, and Satisfactory’s co-op lets friends share one factory and one save. If you want an always-on world everyone can hop into, a dedicated Satisfactory server lets you and your friends keep building even when the host is offline. For setup walkthroughs, our Satisfactory server documentation covers the details. When your first base inevitably turns to spaghetti, our factory layout tips and best starting location guide will help you start your next one cleaner.
Ready to play?
Run your own Satisfactory server with XGamingServer
Spin up an always-on Satisfactory server your friends can join in minutes — no port-forwarding, no tech headaches.