Granting operator (“op”) status is the single most important administrative task on a Minecraft Java server. An op can run cheat and management commands, bypass spawn protection, and — at the highest level — stop or save the server. Get it right and your staff can moderate effectively; get it wrong and you hand someone the keys to your entire world. This guide covers every way to add an op, how the ops.json file is structured, what each of the four permission levels actually unlocks, how the server console fits in, how the whitelist interacts with ops, and how to safely remove operator status when someone leaves your team.
Everything below targets vanilla Java Edition behavior that has been stable across 1.19–1.21.8 (and the calendar-versioned releases that followed in 2026), with version notes where Mojang changed things. If you run Paper, Spigot, or Purpur, the /op command and ops.json work identically — those forks layer plugin permissions on top, but the vanilla op system underneath is unchanged.
The fastest way: the /op command
The simplest method to make someone an admin is the built-in /op command. Run it from an existing op account in-game, or — better — straight from the server console, which always operates at the highest privilege level (more on that below).
/op PlayerName
/deop PlayerName
When you run /op PlayerName, the server writes a new entry into ops.json and grants the player the level defined by the op-permission-level key in server.properties. By default that value is 4 — meaning a plain /op hands over full owner-level control, including the ability to stop the server. If you only want to give someone moderator powers, you must either change op-permission-level first or edit ops.json by hand (covered in the levels section). The /deop PlayerName command reverses it instantly, removing the player’s entry from the file.
A common gotcha: /op works best with the player online, because the server can resolve their current UUID from the session. You can op an offline player by name, and the server will look up the UUID, but on offline-mode (“cracked”) servers the UUID is generated from the name rather than fetched from Mojang — so always confirm the right account got opped. If you’re running a cracked setup, read our walkthrough on allowing cracked players by disabling online-mode before you start handing out admin, because impersonation risk is very real there.
Inside ops.json: the file that stores every operator
Every op on your server is recorded in a single file, ops.json, located in the server’s root directory alongside server.properties, whitelist.json, and your world folders. It is a JSON array of objects — one object per operator. Here is the exact structure:
[
  {
    "uuid": "a1b2c3d4-e5f6-7890-abcd-ef1234567890",
    "name": "PlayerName",
    "level": 4,
    "bypassesPlayerLimit": false
  }
]
Each field has a precise job:
uuid— the operator’s UUID in hyphenated hexadecimal form. This is the authoritative identifier; the server matches ops by UUID, not username, so a player who renames keeps their op.name— the player’s username. This is primarily for human readability; the UUID is what actually binds the permission.level— the permission level, an integer from1to4. When created by/op, this defaults to whateverop-permission-levelis set to.bypassesPlayerLimit— a boolean. Iftrue, this op can join even when the server is at itsmax-playerscap (they still count toward the total once in).
You can edit ops.json directly through your control panel’s file manager or over SFTP. This is the only way to assign a custom level (1–3) without temporarily changing op-permission-level, because the /op command always grants the configured default. After editing the file manually, run /reload in the console or restart the server so the change is read.
Editing tip: always stop the server (or at least confirm no one is mid-op-command) before hand-editing ops.json. The server rewrites the file on shutdown and on op/deop commands, so an edit made to a live file can be silently overwritten. Validate your JSON — a missing comma or bracket will cause the server to discard the file and your ops will vanish on the next start.
Op permission levels 1–4: what each one actually unlocks
Minecraft Java defines five tiers of permission (0 through 4), and they are cumulative — each level includes everything below it. Level 0 is the default for any non-op player. Levels 1–4 are the op tiers stored in ops.json. Choosing the right level for each staff member is the core of safe server administration: a chat moderator does not need the ability to /stop the server.
| Level | Common name | What it unlocks (cumulative) |
|---|---|---|
| 0 | Default (non-op) | Baseline player. Can enable the TPS/debug graph; sees command-block and console broadcasts if those are enabled. |
| 1 | Moderator | Can bypass spawn protection (build/break inside the protected spawn square). |
| 2 | Gamemaster | Command blocks, /difficulty, F3 debug hotkeys, the operator items tab, target selectors, and most cheat commands. |
| 3 | Admin | Multiplayer-management commands: /ban, /kick, /whitelist, and /op / /deop on other players. |
| 4 | Owner | Everything, including server-management commands like /stop and /save-all. |
So if you want a trusted builder who can ignore spawn protection but not run cheats, set their level to 1. A map-maker who needs command blocks and gamemode switching sits at 2. Staff who handle bans and the whitelist need 3. Reserve 4 for yourself and co-owners only, because level 4 can shut the whole thing down.
Setting a custom level cleanly
The recommended workflow for a moderator (level 1) is to set the server-wide default low, then op, then edit individuals up as needed. In server.properties:
op-permission-level=1With that set, any /op grants level 1, and you bump trusted admins up to 3 or 4 by editing their level field in ops.json. Remember that op-permission-level accepts only 1–4, and that changing it does not retroactively alter existing op entries — it only affects future /op commands.
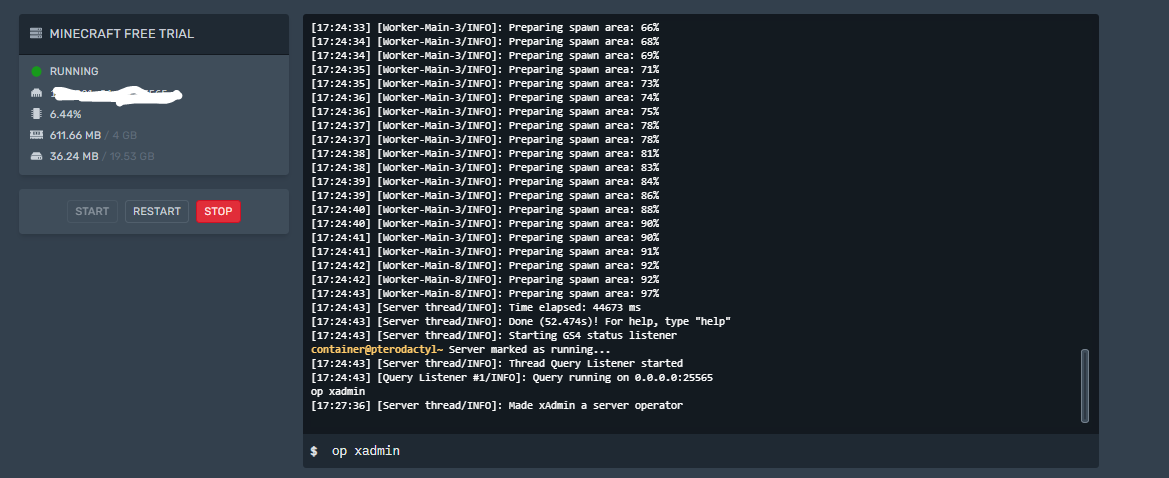
Opping from the server console
The server console — the terminal window or the live console in your hosting control panel — is the safest and most reliable place to grant op, especially the very first time when no one is opped yet. The console always runs at the equivalent of level 4 and needs no op itself, because it is the server. That solves the classic chicken-and-egg problem: you can’t op yourself in-game until someone has opped you, but the console can op anyone at any time.
From the console, commands are typed without the leading slash:
op PlayerName
deop PlayerName
whitelist add PlayerName
If you’re hosting with us, the console is one click away in your game panel — no SSH or terminal knowledge required. Our Minecraft setup documentation walks through finding the console and the config files in the panel step by step. And if you haven’t picked a host yet, our managed Minecraft server plans give you instant console access plus a one-click file editor for ops.json and server.properties.
The whitelist and how ops interact with it
A whitelist restricts who can join your server to an approved list of accounts. It pairs naturally with ops: a tight whitelist plus carefully-leveled ops is the foundation of a secure private server. The whitelist is controlled by two keys in server.properties and the whitelist.json file.
| Key (server.properties) | Default | Effect |
|---|---|---|
white-list | false | Enables access control via whitelist.json. Set true to turn the whitelist on. |
enforce-whitelist | false | When true, kicks already-online players who aren’t whitelisted after the whitelist is reloaded. |
Manage the list with these commands (with slash in-game, without in console):
/whitelist on
/whitelist add PlayerName
/whitelist remove PlayerName
/whitelist list
/whitelist off
A key convenience: operators are automatically whitelisted. You don’t need to add your ops to whitelist.json separately — the server treats them as always-allowed. That said, when you /deop someone, they lose that automatic pass, so if your whitelist is on, a former op who isn’t explicitly whitelisted will be locked out. Plan for that when demoting staff.
Removing op safely
Removing operator status is just as important as granting it — staff leave, trust changes, and stale level-4 ops are a security liability. There are two clean ways to do it.
- Command (recommended): run
/deop PlayerNamein-game ordeop PlayerNamein the console. The player’s entry is removed fromops.jsonimmediately and they drop to level 0. - Manual edit: stop the server, open
ops.json, delete that player’s object from the array (mind the commas so the JSON stays valid), and start the server again.
After a deop, double-check two things: that your whitelist still includes anyone who should stay (deopping removes the automatic whitelist pass), and that no plugin permission group is still granting elevated rights independently of vanilla op. On Paper/Spigot servers, a permissions plugin can keep a user powerful even after deop, so audit both layers.
Spawn protection: the level-2 gotcha
One behavior surprises many new admins: by default, only ops at level 2 or higher can build or break blocks inside the spawn-protection zone. The relevant key is spawn-protection in server.properties, default 16. The number is a radius-like value: the protected square’s side length is 2x + 1, so 16 produces a 33×33-block protected area around the world spawn. Set it to 0 (or a negative value) to disable spawn protection entirely.
This is why a level-1 op can bypass spawn protection — that’s literally what level 1 grants — while a non-op (level 0) cannot touch blocks near spawn. If your builders complain they can’t edit spawn, the fix is either raising their op level or lowering spawn-protection.
Java vs Bedrock: a different permission system entirely
Everything above is Java Edition. If you run a Bedrock Dedicated Server (BDS), the op system is fundamentally different — there is no numeric 1–4 ladder and no ops.json.
- Bedrock uses three named tiers: visitor, member, and operator.
- Permissions are stored in
permissions.json, keyed by the player’s XUID (their Xbox Live identifier) rather than a Mojang UUID. - The server-wide default is set with the
default-player-permission-levelproperty, which acceptsvisitor,member, oroperator.
The two editions are not compatible — a Java ops.json means nothing to a Bedrock server and vice versa. Bedrock also listens on UDP port 19132 (IPv4) and 19133 (IPv6) by default, versus Java’s TCP port 25565. Keep that in mind if you administer both.
What ops can do next: useful admin commands
Once you’re opped, a whole catalogue of vanilla commands opens up. A few you’ll reach for constantly: /gamemode, /gamerule, /difficulty, /give, /tp, /time set, /weather, and the moderation set /ban, /kick, and /pardon. Note that vanilla /ban is permanent only — there is no built-in temporary-ban duration. For timed bans (/tempban), mutes, or an economy, you need a plugin like EssentialsX on a Paper/Spigot server, since vanilla server.jar cannot load plugins.
Game rules deserve a special note for 2026 admins. Mojang renamed every game rule to snake_case in Java 1.21.11 (December 2025): keepInventory became keep_inventory, mobGriefing became mob_griefing, and so on. The old camelCase names still work on 1.21.10 and earlier, so check your version before scripting commands. As an op you’ll use these often — for example to stop the day/night cycle with the daylight game rule, to disable fall damage, or to stop warden spawning in the deep dark.
Frequently asked questions
How do I op myself on my own Minecraft server?
Open the server console (in your hosting control panel or the terminal where the server runs) and type op YourUsername with no slash. The console runs at level 4 and needs no op of its own, so this works even when nobody is opped yet — it’s the standard way to bootstrap the first operator. If you have local terminal access to a self-hosted server, the same command works there. You cannot op yourself purely in-game until another op or the console has opped you first.
Where is the ops.json file located?
ops.json sits in the root directory of your Minecraft server, in the same folder as server.properties, whitelist.json, the server jar, and your world folders. On a managed host you’ll find it in the file manager of your control panel; on a self-hosted server it’s wherever you launch the jar from. It’s a plain JSON array, so you can open and edit it in any text editor — just stop the server first and keep the JSON valid so the server doesn’t discard it on startup.
How do I make someone an admin but not give them full control?
Use the permission levels. A plain /op grants level 4 (full owner control) by default, which is usually too much. Either set op-permission-level in server.properties to a lower number before opping, or op the player and then edit their level field in ops.json to 1, 2, or 3. Level 1 is a moderator (bypass spawn protection only), level 2 a gamemaster (cheats, command blocks), and level 3 an admin (bans, kicks, whitelist, opping others). Restart or run /reload after a manual edit.
Why doesn’t the /op command work?
The most common causes: you’re trying to run /op as a non-op player in-game (only the console or an existing level-3+ op can op others), you typed a username that doesn’t exactly match the account, or you added a slash when typing in the console (console commands take no slash). On offline-mode servers, also confirm the right UUID was written, since offline UUIDs are name-derived. If a manual ops.json edit isn’t taking effect, you almost certainly need to /reload or restart the server, or your JSON has a syntax error and the file was discarded.
Do operators need to be on the whitelist?
No — operators are automatically whitelisted, so you don’t have to add them to whitelist.json separately while they hold op. The catch is that this pass disappears the moment you /deop them. If your whitelist is enabled and you demote a former staff member, explicitly run /whitelist add for them if you still want them to be able to join as a regular player; otherwise they’ll be locked out.
How do I remove an admin or op from my server?
Run /deop PlayerName in-game or deop PlayerName in the console — this removes their entry from ops.json and drops them to a normal player instantly. Alternatively, stop the server and delete that player’s object from the ops.json array by hand. On Paper or Spigot servers, also check that no permissions plugin is granting them elevated rights outside the vanilla op system, because a plugin group can keep someone powerful even after a vanilla deop.
Wrapping up
Opping an admin is fast — one /op command — but doing it well means understanding what’s underneath: the ops.json array, the four cumulative permission levels, the all-powerful console, and how the whitelist’s automatic pass for ops behaves on demotion. Match each staff member to the lowest level that lets them do their job, keep level 4 to owners only, and audit your op list whenever your team changes. While you’re tuning your server, you might also want to disable creeper and TNT explosions or add an economy — both are classic next steps once your admin team is in place.
Free Minecraft Tools
Speed up your server with our free Minecraft tools:
Ready to play?
Run your own Minecraft server with XGamingServer
Spin up an always-on Minecraft server your friends can join in minutes — no port-forwarding, no tech headaches.