Where you build in 7 Days to Die decides almost everything about how your playthrough unfolds: how often you die, how good your loot gets, and how brutal your Blood Moon nights become. The world of Navezgane is divided into five distinct biomes, and they are deliberately arranged on a gradient — the safe, forgiving Pine Forest at one end and the radioactive, horde-ravaged Wasteland at the other. Push deeper into the dangerous biomes and the loot quality climbs with the risk. This guide breaks down all five biomes, the 2.0 “Storm’s Brewing” elemental hazard system, the consumables that counter each hazard, temperature survival, and the loot-versus-danger trade-off — with clear notes on what applies to PC’s 2.x builds versus the modern Console Edition.
The five biomes at a glance
7 Days to Die has five biomes. The handcrafted Navezgane map contains all five; a Random World Generation (RWG) map omits the Burnt Forest. The core design rule is consistent across versions: danger and loot quality both rise as you move from the Pine Forest toward the Wasteland. The Pine Forest is the safe baseline where every new survivor spawns; the Wasteland carries the highest-tier loot, the toughest enemies, and the biggest hordes. Everything in between is a step up the ladder.
| Biome | 2.0+ environmental hazard | Hazard reducer | Approx. temperature | Danger / loot |
|---|---|---|---|---|
| Pine / Forest | None (starter) | — | ~76–80°F | Safest, baseline loot |
| Burnt Forest | Smoke → Suffocating | Black Lung Serum | ~75–85°F | Slightly above forest |
| Desert | Blowing Sands → Suffocating | Sunstroke Tonic | ~95–105°F (heat) | Higher loot/danger; oil & sand |
| Snow | Freezing Air → Suffocating | Scorcher Stew | ~28–32°F (cold) | Higher loot/danger; abundant animals |
| Wasteland | Blowing Fallout → Radiation | Fallout Flush | Variable | Highest tier loot + highest danger |
Pine Forest — the safe baseline
The Pine Forest is where you start, and for good reason. It carries no environmental hazard, sits at a comfortable temperature of roughly 76–80°F, and holds the gentlest enemy spawns in the game. Loot here is the baseline against which every other biome is measured — it is not bad, it is simply the reference point. Trees give you wood, you will find the standard early-game zombies, and the temperature almost never threatens you.
For new players and most server communities, the Pine Forest is the recommended home-base location. You can establish a fortified base, learn the crafting tree, and prepare for your first Blood Moon without the world actively trying to suffocate, freeze, or irradiate you. Treat it as your launchpad: build here, gear up here, then make supply runs into the harsher biomes for better loot before retreating to safety.
Burnt Forest — the smoldering step up
The Burnt Forest is a scorched, ashen version of the pine woods — charred trees, gray haze, and a slightly elevated threat level. Its temperature sits around 75–85°F, close to the Pine Forest but a touch warmer. The defining feature in the 2.0+ biome-progression system is Smoke: spend too long here without proper protection and the smoke debuff escalates toward a Suffocating state that drains you over time.
The counter is Black Lung Serum, the reducer consumable tied specifically to smoke exposure. Loot and danger are only marginally above the Pine Forest, which makes the Burnt Forest a sensible second-biome to explore once you have a little armor and a few serums stockpiled. Note that this biome only exists on the handcrafted Navezgane map — if your server runs an RWG world, you will not encounter it at all.
Desert — heat, oil, and rising stakes
The Desert raises the stakes meaningfully. Daytime temperatures run hot — roughly 95–105°F — which introduces a real dehydration threat: you will burn through water faster and risk a heat penalty if you are not dressed for it. On top of the heat, the 2.0+ hazard here is Blowing Sands, which escalates toward Suffocating just as smoke does in the Burnt Forest. The reducer consumable for desert conditions is Sunstroke Tonic.
What you get in return is better loot and valuable resources — the Desert is a key source of oil and sand, materials that feed into fuel, concrete, and other mid-game crafting chains. The loot quality is a clear step above the forest biomes. Come prepared: light, heat-appropriate clothing, plenty of water (jars, murky water boiled clean, or cooked drinks), and Sunstroke Tonic on hand for when the blowing sands start to bite.
Snow — freezing air and abundant game
The Snow biome is the Desert’s cold mirror. Temperatures hover around 28–32°F — cold enough to threaten you with freezing if you are underdressed. The 2.0+ hazard is Freezing Air, which, like the other biome hazards, escalates to a Suffocating state without proper protection. The reducer consumable here is Scorcher Stew, a warming dish that helps offset the cold.
The Snow biome’s standout reward is wildlife: it is rich in animals, making it one of the best places to farm meat and leather. That makes it attractive for players who want to stock food and craft armor, provided they invest in warm clothing first. As with the Desert, the loot quality sits above the forest baseline, so the trips pay off — just dress for the cold and keep Scorcher Stew in your hotbar.
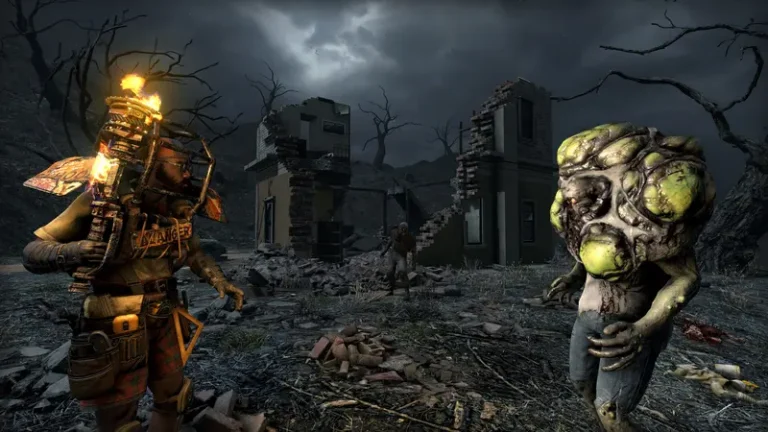
Wasteland — the deadliest, richest biome
The Wasteland is the endgame biome. It carries the highest-tier loot in the game, but it earns that loot with the most punishing conditions anywhere on the map: the largest hordes, the toughest enemies, and a hazard that does not just suffocate you — it irradiates you. The 2.0+ hazard here is Blowing Fallout, which escalates into outright Radiation. Temperature in the Wasteland is variable rather than fixed to a single comfortable band.
The reducer for radiation exposure is Fallout Flush. You should not set foot in the Wasteland for extended runs until you have proper protective armor, a stock of Fallout Flush, and serious firepower. This is where late-game players go for the best gear, and it is where the most dangerous specials concentrate. The risk-to-reward ratio is intentionally extreme: best loot, worst odds of walking out alive.
The 2.0 “Storm’s Brewing” hazard system
The biome-progression hazards described above arrived with version 2.0 “Storm’s Brewing” (experimental June 16, 2025; stable June 30, 2025). The system reframes biomes as a progression ladder: each advanced biome applies an escalating environmental debuff if you enter without the right armor or buffs, climbing toward “Suffocating” (smoke, sand, freezing air) or “Radiation” (fallout). The 2.0 update also re-added a temperature mechanic and introduced a Dynamic Storm system, new zombies, and new high-tier zombie classes.
You manage these hazards three ways, in combination:
- Protective armor and clothing — the primary defense; the right gear blunts the hazard before it escalates.
- Reducer consumables — Black Lung Serum (smoke), Sunstroke Tonic (desert), Scorcher Stew (cold), Fallout Flush (radiation).
- Weather and temperature gear — appropriate clothing to handle the Desert’s heat and the Snow biome’s cold so dehydration and freezing never set in.
Without these, stepping into an advanced biome simply chips away at you until the debuff hits its worst state. With them, the same biomes become farmable. The escalation is the whole point — it gates the best loot behind preparation rather than raw level.
Temperature survival
Temperature is a survival layer that sits on top of the hazard system. The Pine Forest and Burnt Forest are comfortable (mid-70s to mid-80s °F). The Desert pushes you into the 95–105°F range where dehydration accelerates, while the Snow biome drops to roughly 28–32°F where cold and freezing become the threat. Manage temperature with the right clothing and armor for the biome, the listed reducer consumables, and weather gear. In practice that means stripping down and drinking heavily for the Desert, and bundling up with warm clothing for the Snow biome — the opposite mistakes will cost you health fast.
The loot-versus-danger gradient
Tougher biomes carry a higher loot stage, so the gear you pull improves as you move up the danger ladder. The community-cited shorthand puts the Forest as the baseline, with the Desert, Snow, and Wasteland layering on progressively larger loot bonuses — the Wasteland sitting at the top. The exact percentages, however, are version-dependent and come from third-party community and host data, so it is safest to treat them qualitatively: Forest is the baseline; Desert and Snow are clearly better; the Wasteland is the best. Notes around the 2.2 update reportedly removed earlier biome loot-stage caps and restored these bonuses, but if you want hard numbers for your current build, confirm them against the live wiki for the version you are running.
The practical takeaway: base in the Pine Forest, then plan deliberate expeditions into the harsher biomes once you have the armor and consumables to survive them. Each biome you “unlock” by preparing for its hazard opens a better loot pool — and the Wasteland is the final, richest, deadliest tier.
Biomes, hordes, and your server settings
Biome danger compounds with the Blood Moon. By default a horde night hits every 7th day, running from 22:00 to 04:00, and it scales with your hidden Game Stage. Camp your base in the Wasteland and those hordes arrive on top of an already hostile biome — another reason most groups keep their main base in the Pine Forest. If you run your own dedicated server, the relevant knobs live in serverconfig.xml:
Choosing GameWorld directly determines which biomes your players will see — pick Navezgane if you want the full five including the Burnt Forest, or RWG for a fresh seeded world. If you would rather skip the manual file editing, a managed dedicated 7 Days to Die server gives you these settings in a control panel with instant deploys. For the full walkthrough of installing and configuring a box yourself, see our 7 Days to Die server documentation. And if Blood Moon survival is your real concern, our Blood Moon horde strategy guide goes deep on kill corridors and trap layouts.
PC versus Console: what actually applies
This is the most important caveat in the guide. The five-biome layout and the core “Wasteland is deadliest, Forest is safest” gradient exist on every modern version of the game. But the 2.0 biome-progression hazard system — Smoke, Blowing Sands, Freezing Air, Blowing Fallout/Radiation, and their Suffocating escalation — is a PC 2.x feature.
The modern Console Edition (PS5 and Xbox Series X|S) launched on July 25, 2024 on the 1.0 content base, simultaneously with PC 1.0, published by The Fun Pimps. Historically console has lagged PC by a patch or two. Whether your Console Edition has the full 2.0 hazard system depends on its current patch level — so on console, frame biomes against the 1.0-era model and verify your build’s patch level before relying on the hazard mechanics described here. Do not confuse this with the old 2016 Telltale legacy console version (PS4/Xbox One), which is no longer developed and runs a completely different, frozen feature set.
Frequently asked questions
Which biome is the safest to build my base in?
The Pine Forest. It has no environmental hazard, a comfortable temperature around 76–80°F, the gentlest enemy spawns, and serviceable baseline loot. It is the recommended home-base location for new players and the launchpad for supply runs into harsher biomes.
Which biome has the best loot in 7 Days to Die?
The Wasteland. It carries the highest-tier loot in the game, but it also has the largest hordes, the toughest enemies, and the Blowing Fallout hazard that escalates into radiation. The loot gradient runs Forest (baseline) → Desert and Snow (clearly better) → Wasteland (best). Do not go in without protective armor, Fallout Flush, and strong weapons.
What are the biome hazard reducer items and what do they counter?
Each advanced biome’s 2.0+ hazard has a matching reducer consumable: Black Lung Serum for the Burnt Forest’s smoke, Sunstroke Tonic for the Desert’s blowing sands and heat, Scorcher Stew for the Snow biome’s freezing air, and Fallout Flush for the Wasteland’s radiation. These work alongside proper armor and weather gear, not as a replacement for it.
Does the Console Edition have the 2.0 biome hazards?
Possibly not, depending on its patch level. The 2.0 “Storm’s Brewing” biome-progression hazard system is a PC 2.x feature. The modern Console Edition launched on the 1.0 base in July 2024 and historically lags PC by a patch or two. Check your console build’s current patch level before relying on smoke/sand/freezing/fallout mechanics — the 1.0-era base may use the older biome and temperature model.
How many biomes are there, and does it differ by map?
There are five biomes: Pine Forest, Burnt Forest, Desert, Snow, and Wasteland. The handcrafted Navezgane map has all five. A Random World Generation (RWG) map omits the Burnt Forest, so it features the other four. You set this on a dedicated server with the GameWorld property (Navezgane or RWG) in serverconfig.xml.
How do biomes interact with the Blood Moon horde?
The Blood Moon hits every 7th day by default (22:00–04:00) and scales with your hidden Game Stage, the number of players, and difficulty. Basing in a dangerous biome like the Wasteland stacks tougher horde compositions on top of an already hostile environment, which is another reason most groups keep their main base in the Pine Forest. To set up your own world, gear up with the right weapons and parts, or learn the enemy roster, see our guides below.
Keep building: learn how to source the mechanical parts that gate your mid-game workstations and vehicles, study the full zombie types roster so you know what each biome throws at you, and review the console weaponry guide to make sure your loadout can handle a Wasteland run.
Ready to play?
Run your own 7 Days to Die server with XGamingServer
Spin up an always-on 7 Days to Die server your friends can join in minutes — no port-forwarding, no tech headaches.