In this guide, we will show you how to make your 7 Days to Die server private by setting up a password on your server.
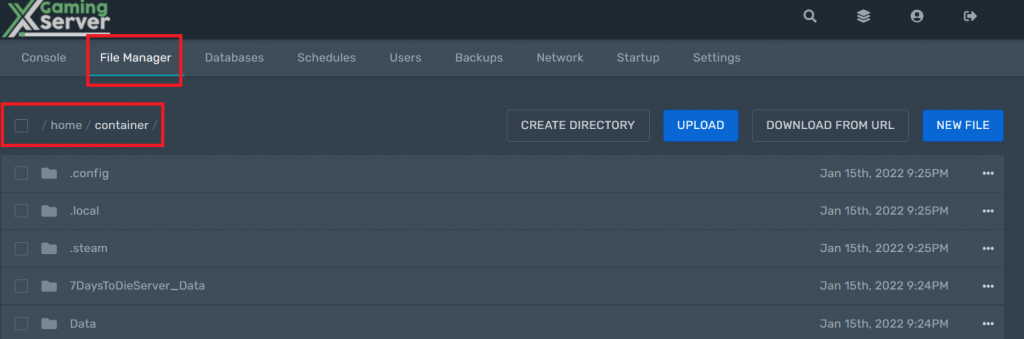
First of all, open your server control panel and navigate to the file manager section.
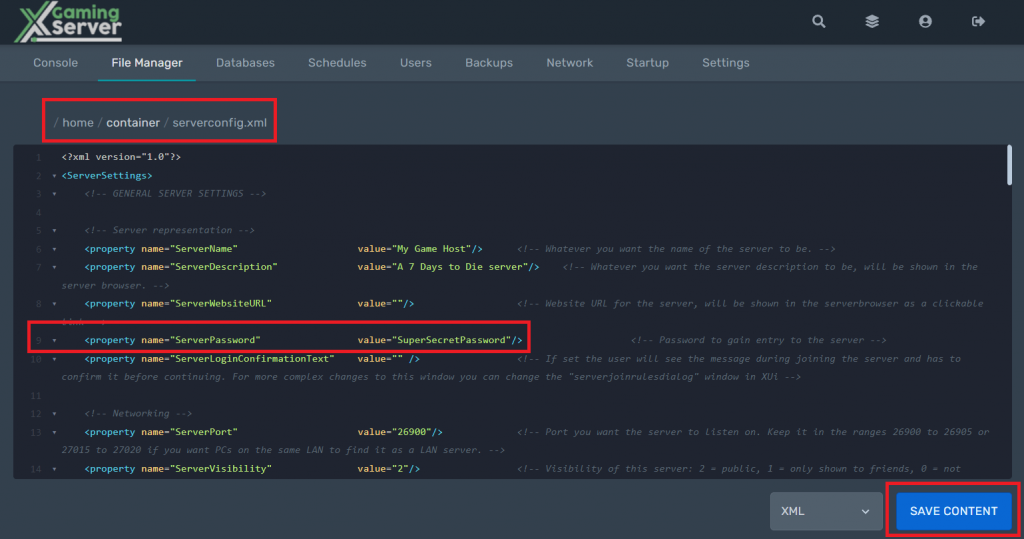
Then, open the serverconfig.xml file and change the “ServerPassword” property value to your own password that you want. Don’t forget to save the changes with the blue “SAVE CONTENT” button.
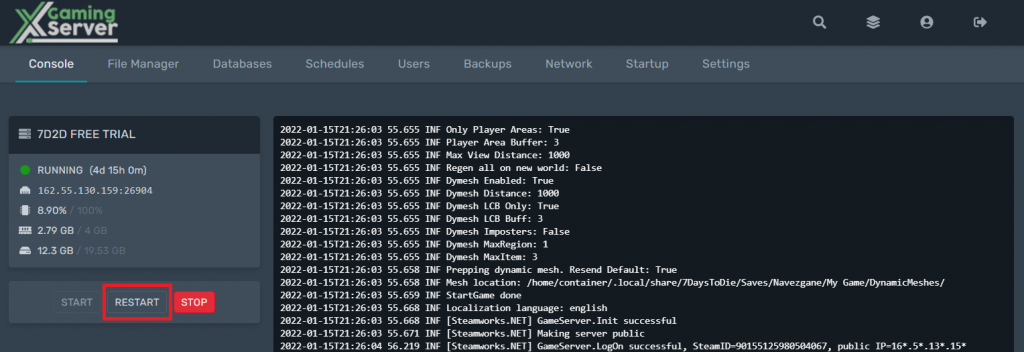
Restart your server in the console section and your 7 Days to Die server is now private. Now, anybody who will try to connect to your server will have to type in the password that you just set up.
Ready to play?
Run your own 7 Days to Die server with XGamingServer
Spin up an always-on 7 Days to Die server your friends can join in minutes — no port-forwarding, no tech headaches.
99.9%Uptime SLA
< 5 minInstant setup
24/7Human support
DDoSProtected
Instant setup
Your server is live in minutes with a one-click control panel.
Mods & plugins
Install mods, plugins and workshop content in a few clicks.
DDoS protected
Enterprise DDoS mitigation keeps your server online 24/7.
Low-latency hardware
Premium CPUs & NVMe SSDs for lag-free multiplayer.
Free backups
Automatic backups so your world is never lost.
Real human support
Gamers helping gamers — 24/7, no bots, no scripts.