
Table of contents
Introduction : How to migrate Palworld server hosting
When it comes to maintaining the continuity and performance of your Palworld gaming experience, migrating your dedicated server is a crucial task. Whether you’re upgrading to a more robust server or simply shifting to a different hosting environment, understanding the nuances of server migration is vital. This comprehensive guide is designed to provide you with step-by-step instructions on how to seamlessly transfer your Palworld dedicated server from one machine to another, ensuring minimal downtime and optimal performance.
Step 1: Collecting Essential Files from Your Current Server
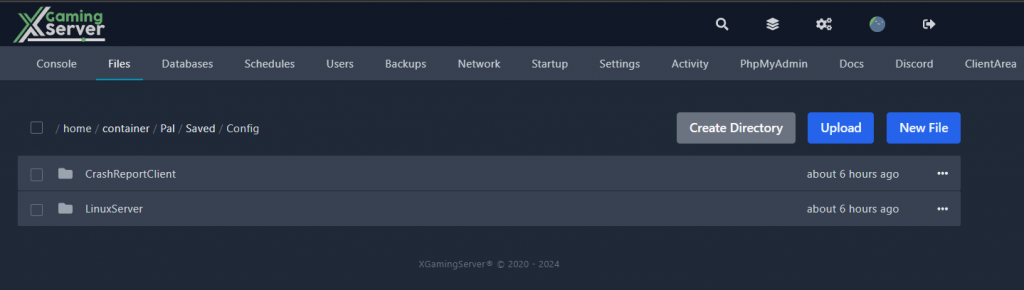
A. Server Configuration File
- Location and Backup:
- Windows Server:
steamapps\common\PalServer\Pal\Saved\Config\WindowsServer\PalWorldSettings.ini - Linux Server:
steamapps/common/PalServer/Pal/Saved/Config/LinuxServer/PalWorldSettings.ini - Action: Copy the
PalWorldSettings.inifile and securely store it on your computer.
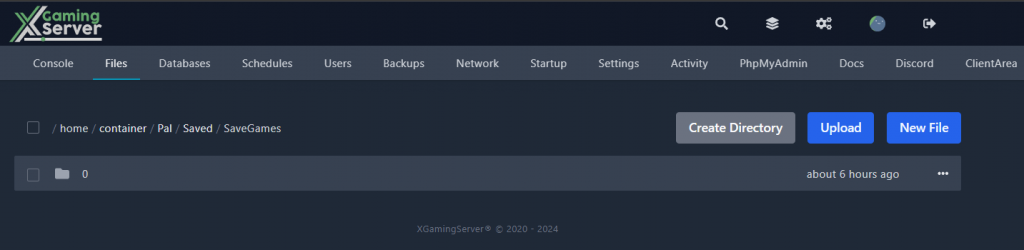
B. World Save File
- Location:
steamapps\common\PalServer\Pal\Saved\SaveGames\0\ - Identification: The world save is identifiable as a long alphanumeric string, e.g.,
77E83DCD469E35E41315FFAC2F27E7C6. - Action: Copy the entire folder named with the long string to your computer.
Step 2: Setting Up Your New Server
- Initialization: Install and run the Palworld dedicated server software on your new machine.
you can rent a Palworld dedicated server from us - This process will generate new configuration and save files.
- Shutdown: Once these files are created, shut down the server.
Step 3: Transferring Data to Your New Server
A. Uploading Server Settings
Utilize your server’s supported upload mechanism (FTP, SFTP, etc.) You can do this using SFTP see guide on How to Upload files using SFTP on XGamingServer Panel
- Place your
PalWorldSettings.iniin/home/container/Pal/Saved/Config/LinuxServer. - Note: Overwrite any existing file in the destination.
B. Uploading World Save
- Destination:
/home/container/PalServer/Pal/Saved/SaveGames/0/ - Action: Upload your world save folder (the long string named folder) to this location.
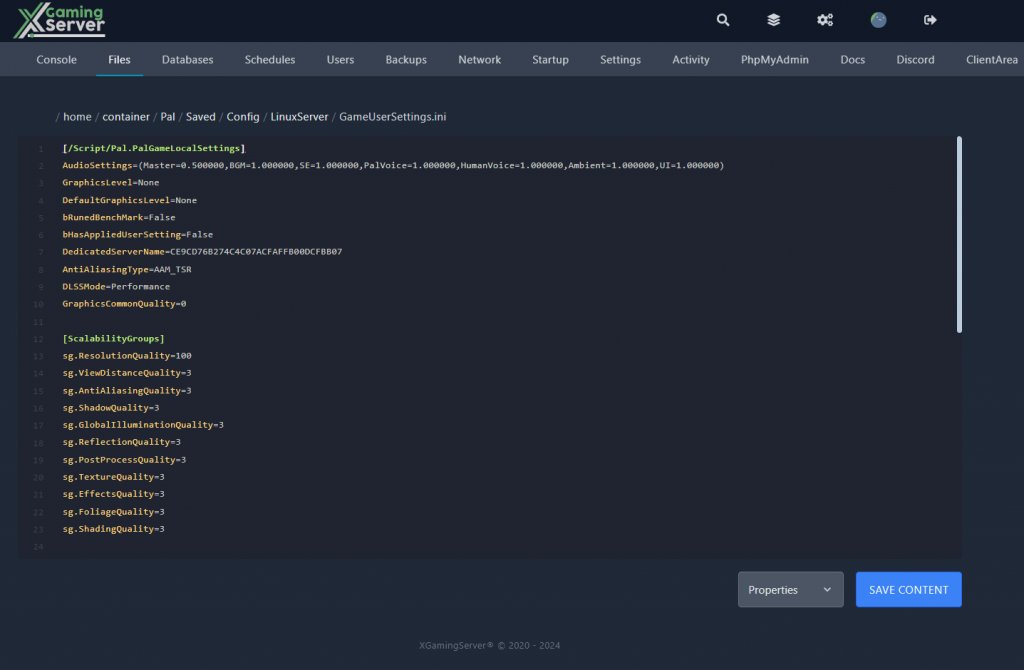
C. Modifying GameUserSettings.ini
- File Locations:
/home/container/Pal/Saved/Config/LinuxServer/GameUserSettings.ini - Modification: Change the
DedicatedServerName=to match your save file’s folder name (the alphanumeric string).
Step 4: Finalizing the Migration
- Server Restart: Run your new server.
- Connectivity Test: Ensure you can connect to your server and that all settings and world data are intact.
Conclusion
Migrating your Palworld dedicated server is a critical process that requires attention to detail. By following these steps, you can ensure a smooth transition to your new server, maintaining your game’s integrity and performance.
With this guide, you’re now equipped to handle your Palworld server migration with confidence and precision. Happy gaming!
Looking to host a dedicated Palworld server? Host one with us

Ready to play?
Run your own Palworld server with XGamingServer
Spin up an always-on Palworld server your friends can join in minutes — no port-forwarding, no tech headaches.