Just rented out Project Zomboid server and you can’t figure out how to transfer your game saves and world? Then this guide will show you how to upload them to your server
Transferring Config and World Files
You will need to locate your Zomboid folder
- Windows: C:\Users\<username>\Zomboid\
- Linux: ~/Zomboid/
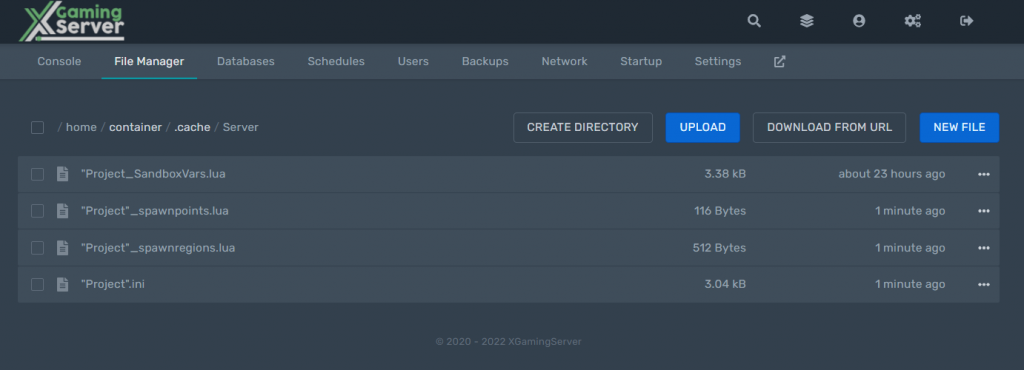
In the “Server” subfolder, you will find configuration files for each server or hosted game that you’ve set up. They will be named “<servername>.ini”, “<servername>_SandboxVars.lua” and so on. Upload these files into the same location on the server.
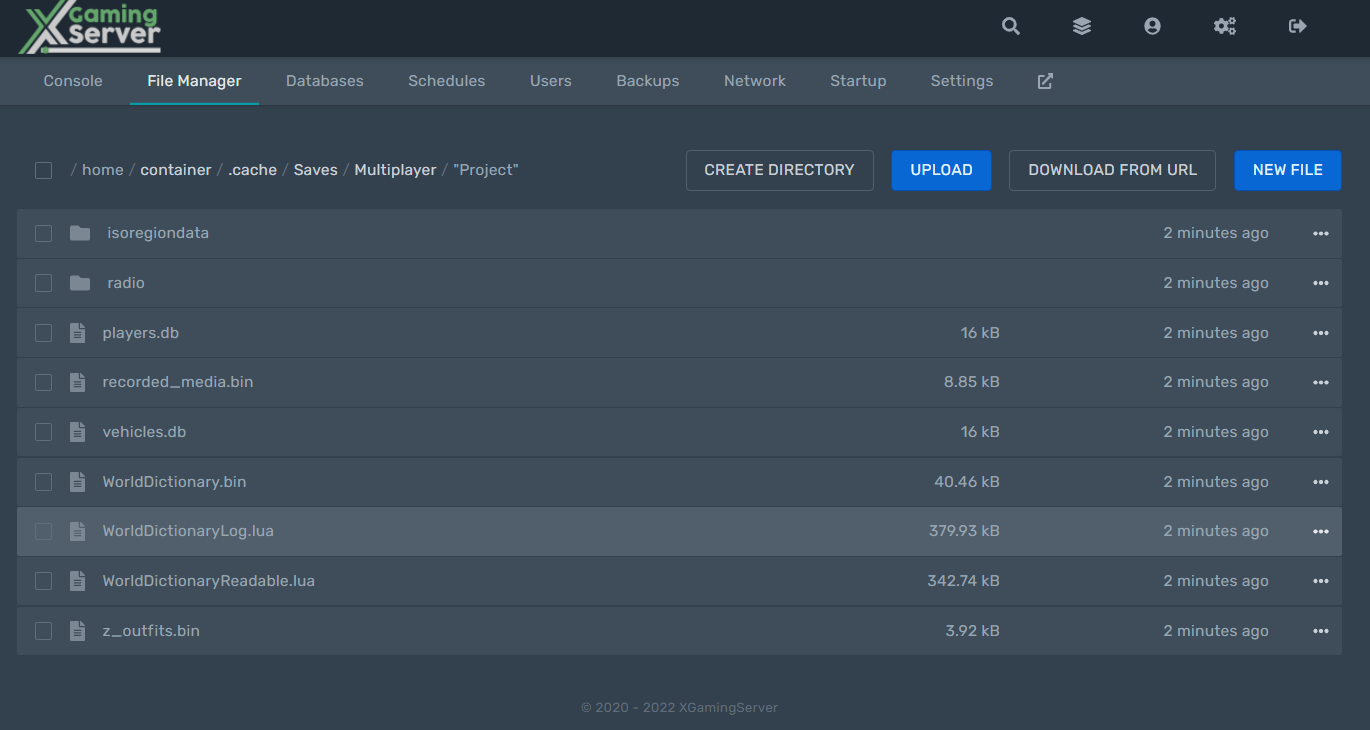
.cache/Server
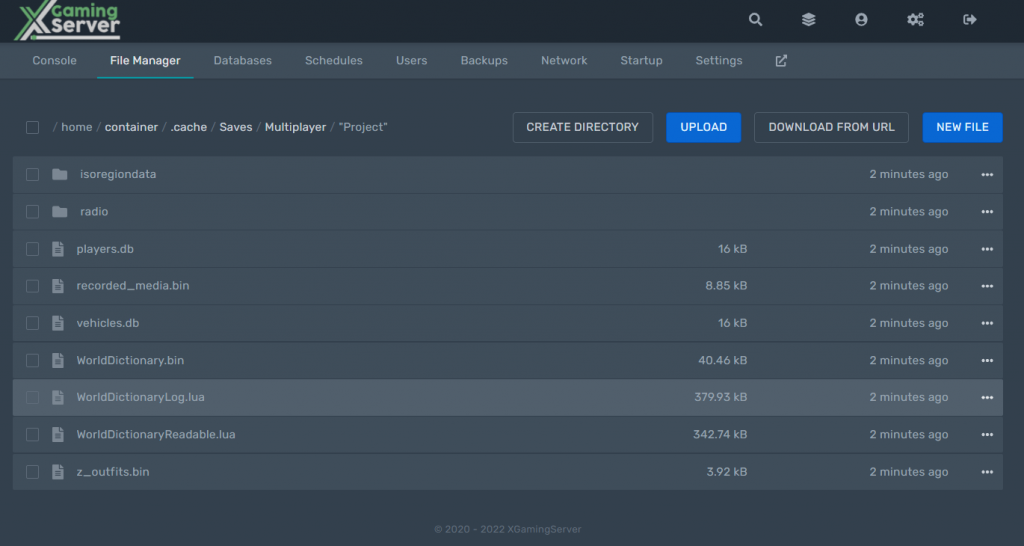
Next, in “Saves/Multiplayer/<servername>” you will find all the world save information, which includes items, zombies, players, vehicles etc.
Upload this folder to the server’s “Multiplayer” folder.
.cache/Saves/Multiplayer/”Project”
Make sure you maintain server name. As this may cause issues with the database. Certain database files refer to the server name so changing it could have adverse effects.
Note:
Do not copy <servername>.db
There is also a “<servername>.db” file in the “db” folder. This file contains login information for Steam accounts (when using the host option in-game) or user / password based accounts when hosting a dedicated server. Due to how Steam accounts are not compatible with user / password accounts, I recommend NOT including this file. More on this in the next section.
Reinstalling Mods
You also have to install mods that were in the local hosted sever to the rented server. or else you will be faced with missing mods errors.
You can do this by simply copying the lines form your local server to the config file on the hosted server and save
WorkshopItems=2701170568;5801370468
Mods=ModManager;modoptions;MoreDescriptionForTraits
Flow this tutorial for an in-depth guide on how to install the mods on the PZ server.
Maintain Game Characters for that World
Players who’ve been playing in your world before might not be able to log into the same characters they’ve played as before, and instead have to create a new character altogether.
To avoid this you have two options
- Either edit player.db file, see this guide on how to do that
or
- Make sure every player from the old hosted server can create accounts with the Steam name they used
Transfer Map Information
Go to the “Saves” subfolder, then “Multiplayer”. In here you’ll have one folder for each server you’ve joined. Hosted games will have the format “<steamid>_<servername>_player”. (This uses the Steam ID of the person who hosted the game.) Dedicated servers have the format “<address>_<port>_…”.
Once you’ve found the right folders, delete the files inside the dedicated server folder to which you want to copy the map information. Then copy the files from the hosted game folder into the dedicated server folder.
Looking for a Project Zomboid Server to rent? Rent one from us
Ready to play?
Run your own Project Zomboid server with XGamingServer
Spin up an always-on Project Zomboid server your friends can join in minutes — no port-forwarding, no tech headaches.