In this guide, you will find all the important information for configuring your Rust server for the first time. It is recommended to read this guide first before using your Rust server to make sure everything goes smoothly.
Getting started
This section of the guide will teach you the most essential information, that you need to know before you can start using your Rust server.
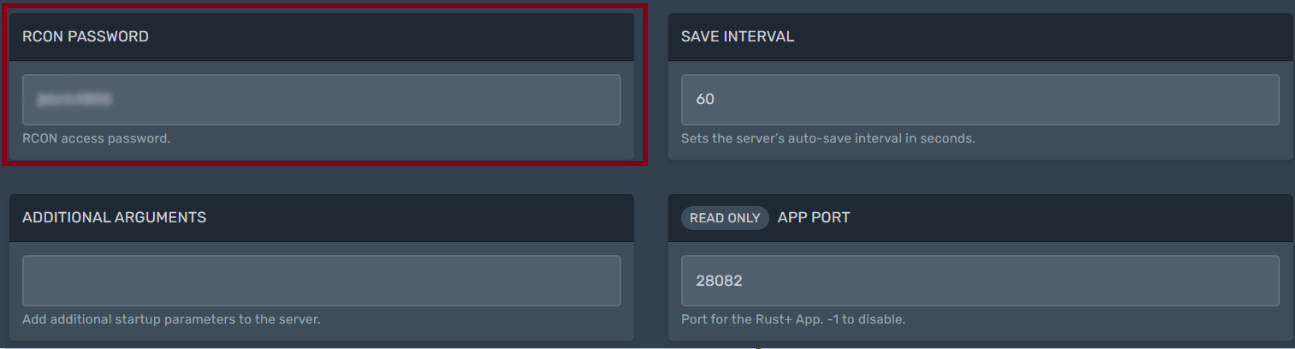
RCON password
This one is first because it’s the most important. It is a password to your Rust server console, which won’t be secure until you change it. It’s set to “CHANGEME” by default and it’s very important that you change it to a new one. Otherwise, it will be easy for anyone to make unauthorized changes to your server.
Log in to your control panel and navigate to the startup section.

Then, scroll down and change the RCON PASSWORD value.
Server admin
Next, you probably want to became an admin on your Rust server to get access to all the admin commands such as ban, kick, mute, noclip or godmode. It will also allow you to give yourself any items in the game.
Check the Rust Wiki for all the commands that you can use as an admin.
Admin roles
There are two admin roles that you can use.
- OWNER – Has access to all server commands and can add or remove other admins.
- MODERATOR – Has access to all server commands but can’t add or remove other admins.
Making yourself an admin
First of all, you will need to get your STEAM64 ID. You can find it here. Secondly, navigate to your server console and use the following command. Make sure your server is running.
“OWNERID STEAM64ID PLAYERNAME“
Examples:
This command would give the player admin role on your Rust server.

This command would give the player moderator role on your Rust server.

Connecting to your server for the first time
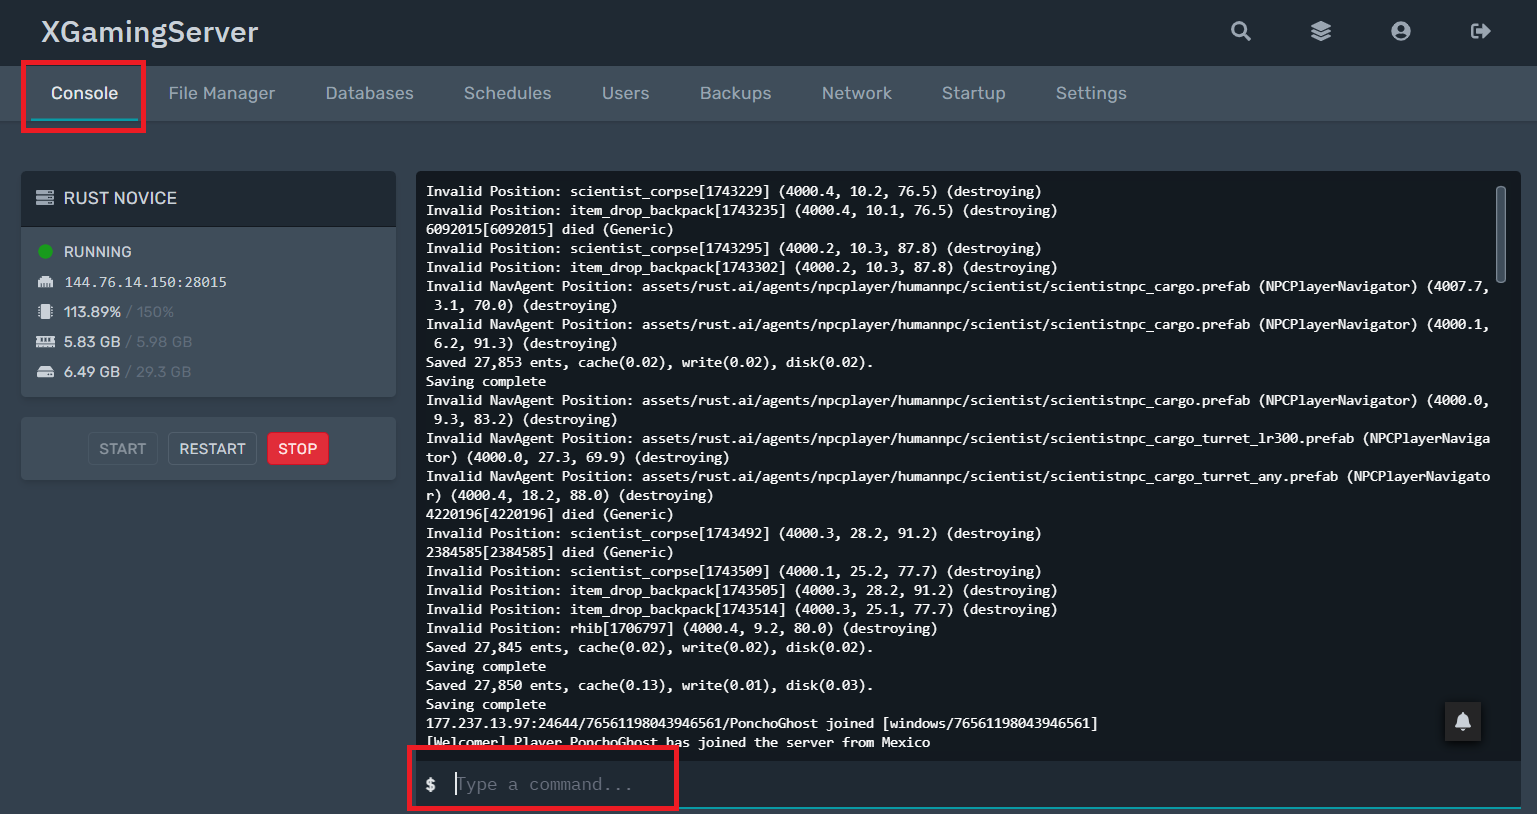
To connect to your server for the first time, open your server control panel and copy the server IP address from the console section.
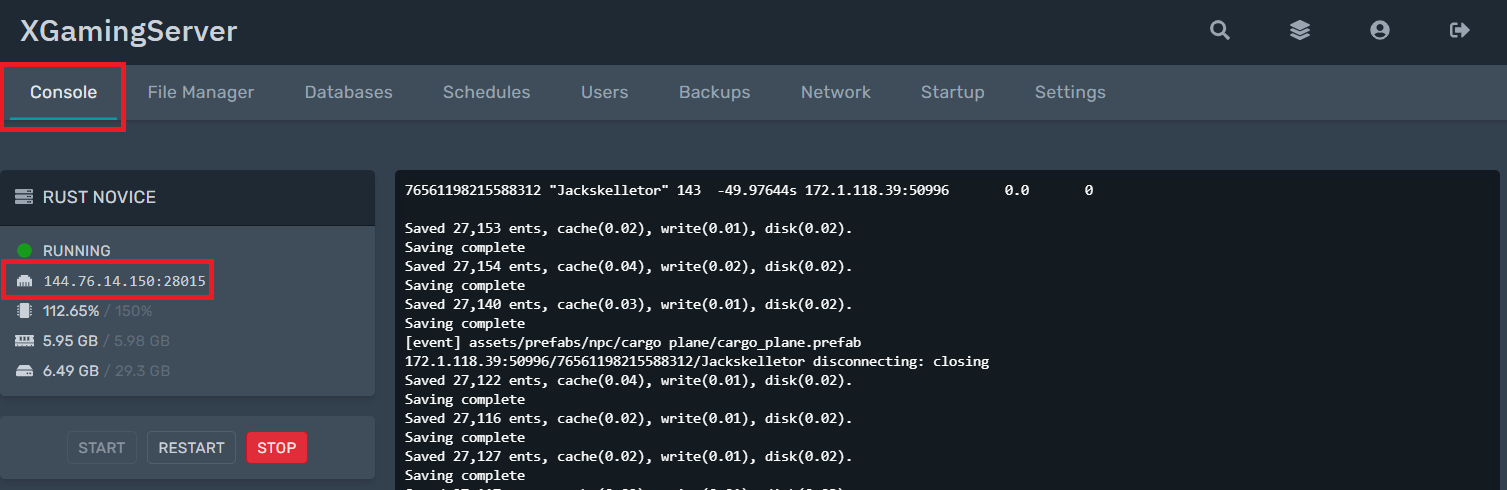
Then, open Rust and press the F1 key to open the console. use the “connect” command followed by your server IP to connect to your server.

Once connected, you can check if you got the admin role by typing something in the in-game chat. If your nickname is green, then you set your admin roles correctly.
You won’t have to connect by IP all the time, your server will be later displayed in the server list. But first, we need to change the server name.
Configurating your server
This section of the guide will teach you how to change your server by your preferences. Things like server name, description, slots and more.
Server name
To change your server name, navigate again to the startup section in your control panel and change the server name value. Server owners usually add the date they wiped the server (change map and delete all player progression) next to the server name. This lets the players know how old the map is, which helps them to decide on what server to play.

Server description
Your server description is also in the startup section. It is best practice to put there information about your server’s map size, wipe schedule, rules or your discord server. Use “\n” for making a new line in the server description.

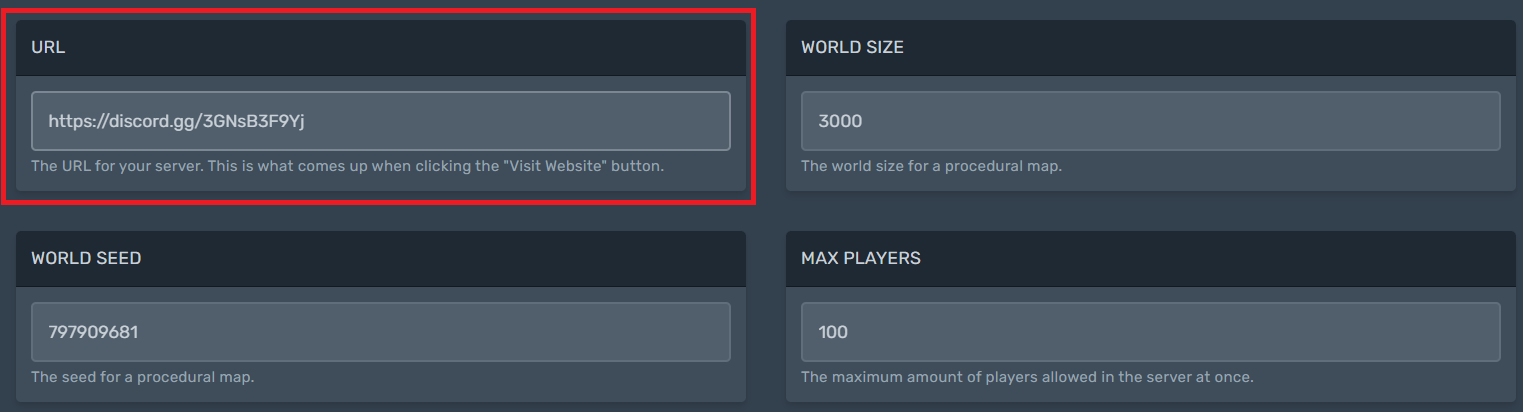
URL
There is a blue ‘VIEW WEBPAGE” button on your server tab in the game that you can use to redirect people to your website or to your discord server, which can be helpful when building a community around your server.
To change the URL, open your server control panel and navigate to the startup section. Then, scroll down and change the URL value.
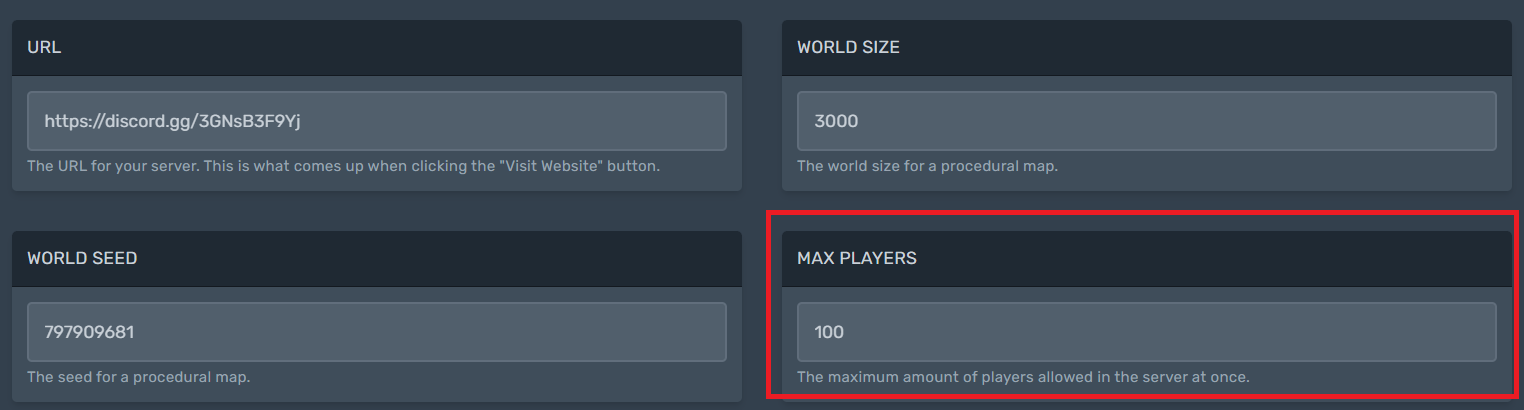
Slots
Slots determine how many players can be on your server at one time. When deciding how many slots to choose, you should think about your servers performance. Not every server can handle 300 players at one time. XGamingServer recommends these slots depending on the server package:
- Novice 20-30 slots
- Rookie 40-60 slots
- Pro 70+ slots
To change your server slots, go to your server control panel and navigate to the startup section. Scroll down and change the max player value.
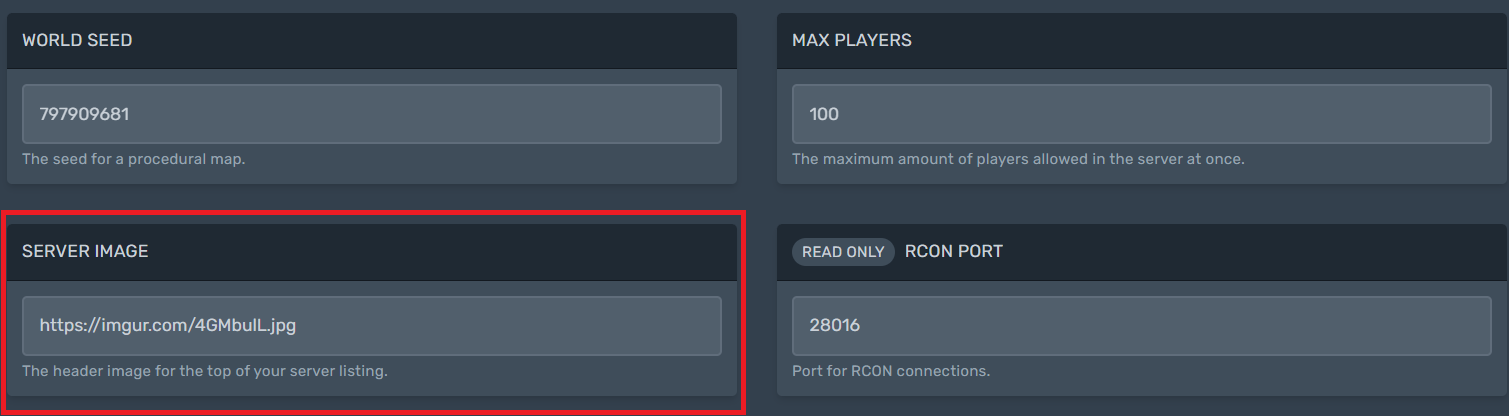
Server image
You can also change the default server image to differentiate from other servers and to attract new players. Firstly, you will have to create your own server graphics in a software like Photoshop or any other alternative. It is good to put your server name with some basic information about your server in the image, so people can get better understanding about your server. Make sure to use 1024×512 resolution, otherwise your image could be stretched or blurry.
Upload your graphics to some image sharing service like Imgur and copy the link.
Then, open your server control panel and navigate to the startup section. Scroll down and put the image link in the server image variable.
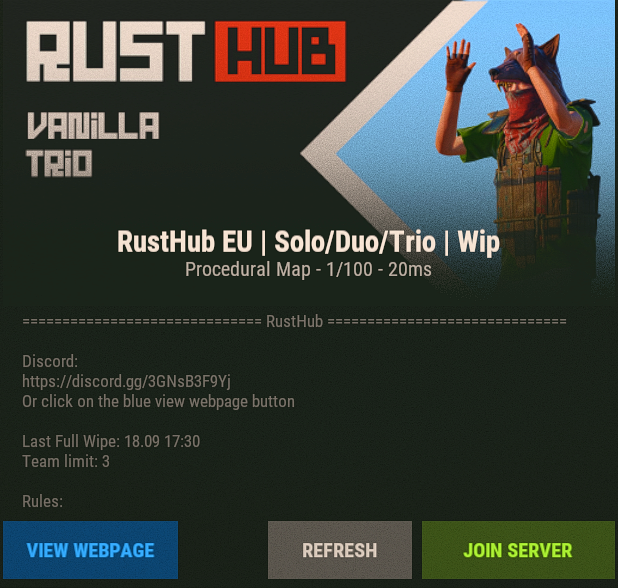
With all the changes we did so far, your server tab could look something like this:

Map
Rust uses procedurally generated maps. This means that almost every Rust server has a different map. But we don’t want a randomly generated map for many reasons. This is why we will use the Rust map gallery. It is a great site where you can choose your map from hundreds of already generated Rust maps.
We recommend changing the map on your server after each wipe, as it will make the server fresh for your players. Playing the exact same map every wipe can get a bit boring. You should also take a look at your map size and monument placement.
Map size
First of all, we need to talk about map size. Having a small map on fully populated Rust server will make it lag and could possibly even crash it. On the other hand, if you make your map too big, players will most likely never interact with each other and could leave your server from getting bored.
Be advised that the popular Launch Site monument is missing on maps smaller than 3500. This might be a reason for some players to not play on your server.
I would recommend these map sizes:
- 2500 for a small private server with a bunch of friends
- 3000 for 50 players.
- 3250 for 100 players
- 3500 for 150 players.
- 3750 for 200 players
- 4000 for 250+players
Changing the map
Now, that you know what map size to choose, go to the Rust gallery site and change the filters.
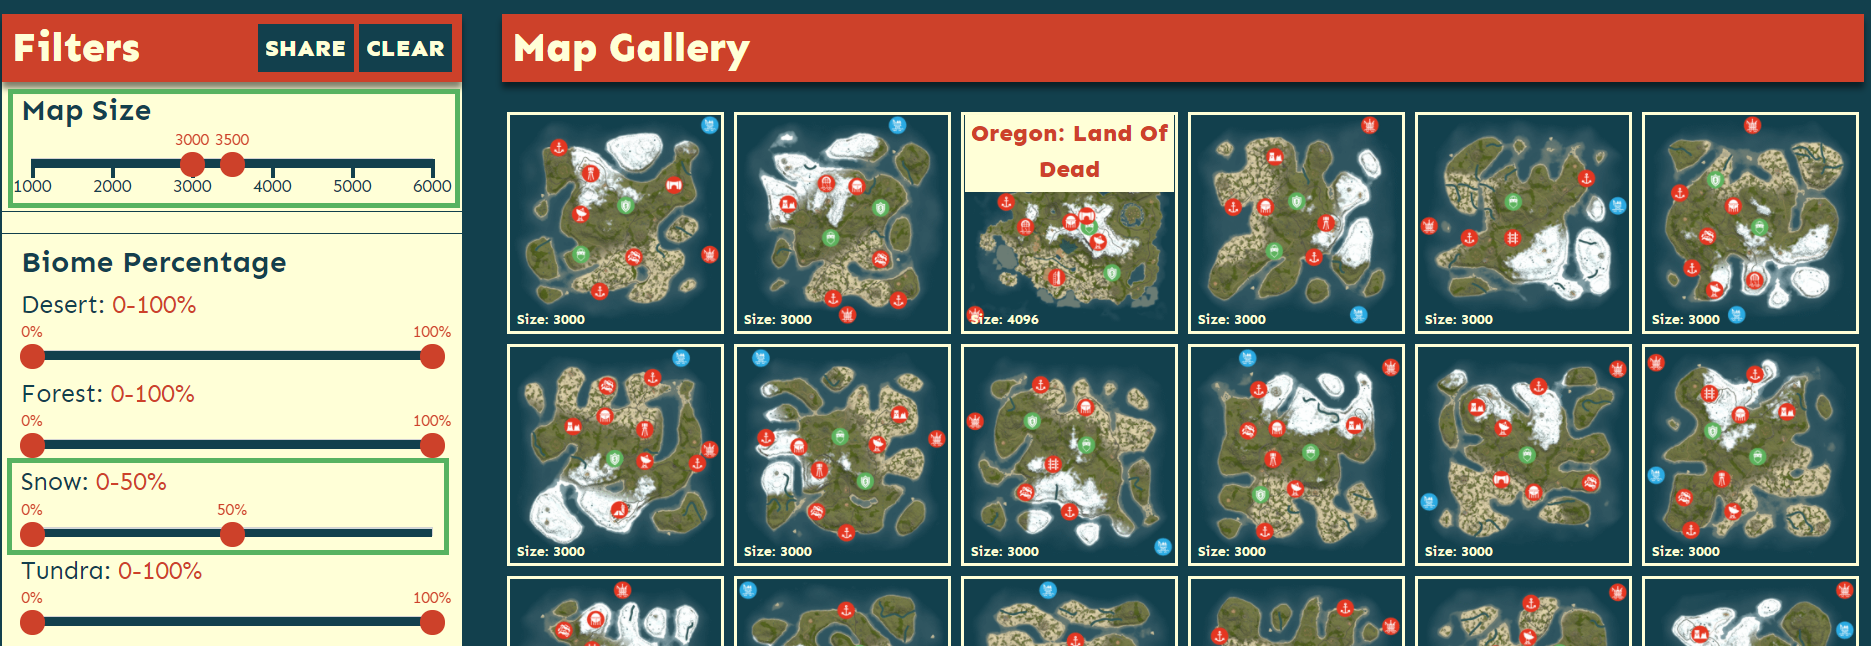
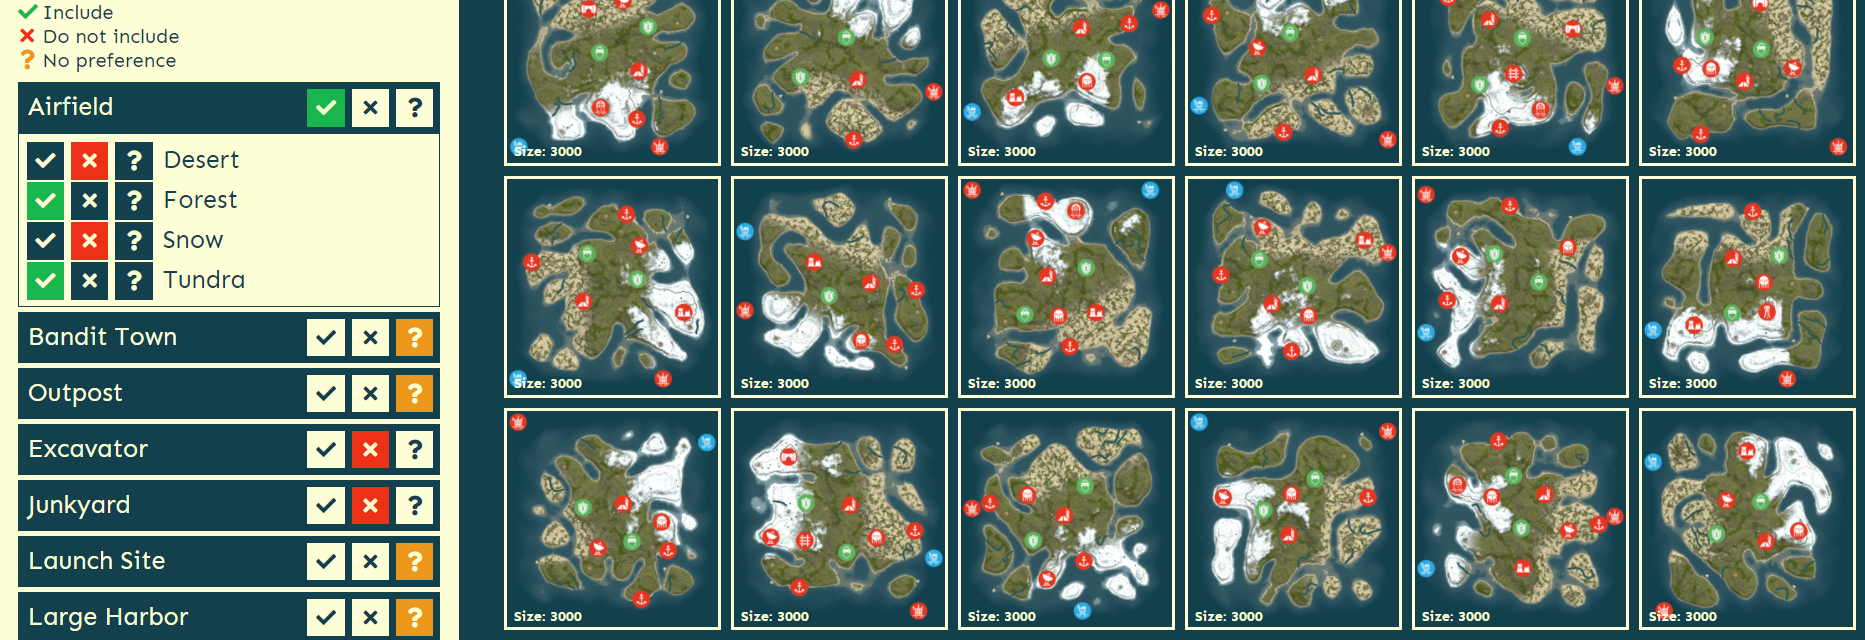
You can also change the biome and monument filters to hide some maps that you don’t like. Then, you just need to pick a map of your choice.
Then, just copy the size and seed of the map you chose.

To change the server map, you will need to go to the server control panel and to the startup section, there you can change the map size and seed.


The last step is to restart your server. It could take some time for the server to generate the new map for the first time, but that’s normal.
Custom maps
There is also an option to use a custom, manually made maps. Check our custom map guide for more info.
Server wipe
Every month, rust requires and automatic server wipe. This is to ensure that servers always have a fresh feel ( server wipe means deleting your map with all the player’s progression ). However, if you want to wipe your server more than once a month, you can do it manually.
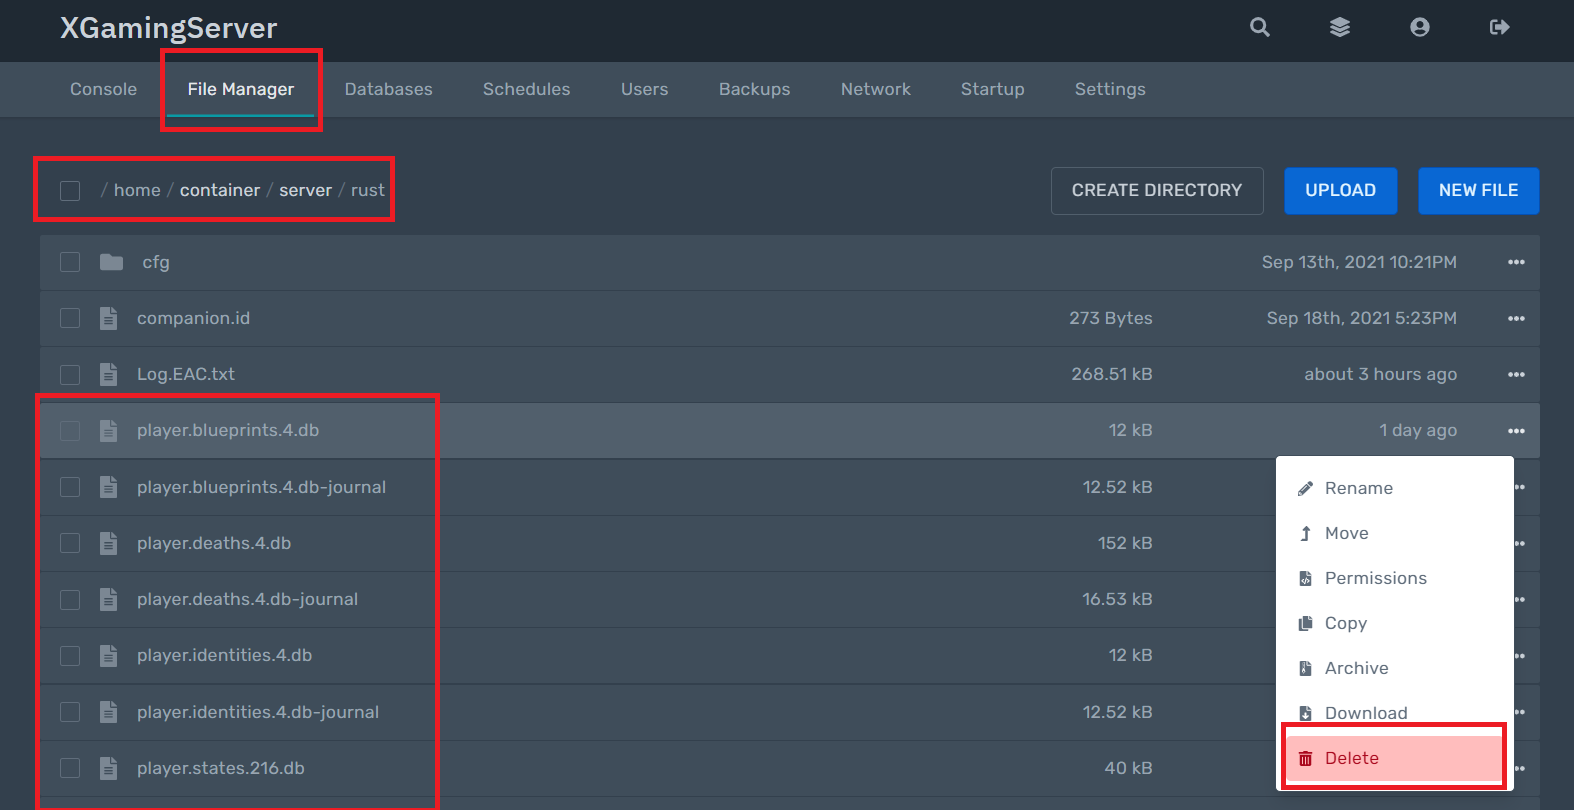
Open your server control panel and navigate to the file manager. Open the server/rust folder and delete any files which end with .map/.sav/.db
Make sure to turn off your server before deleting any files.
Then, you can optionally change your map to make the server feel fresh. Don’t forget to change your server name/description if you have a wipe date in it.
Plugins
uMod (previously known as Oxide) is super popular universal modding platform that developers can use to create plugins and extensions for Rust and other various games. It’s essential to have this framework installed on your Rust server because even if you don’t want your server to be heavily modified, you still need some plugins to protect your server against cheaters and other individuals.
Installing uMod on your Rust server
Firstly, you need to download the framework itself. Go to the official uMod.org page and navigate to the Rust section. Download the Windows/Linux version of the framework depending on what your server is running on. Our XGaming Rust servers are running on Linux.

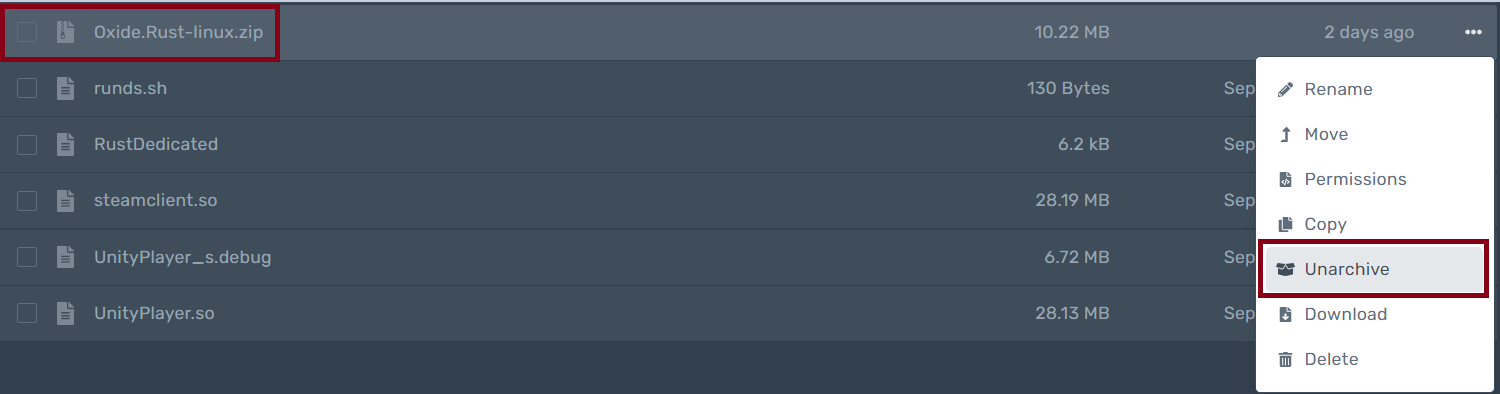
Now, that you have installed uMod, you need to navigate to your server control panel and then to the file manager. There you can upload and unarchive the Oxide.Rust.zip file that you just downloaded. The RustDedicated_Data folder will automatically be overwritten with all the uMod files and a new oxide folder will be created.

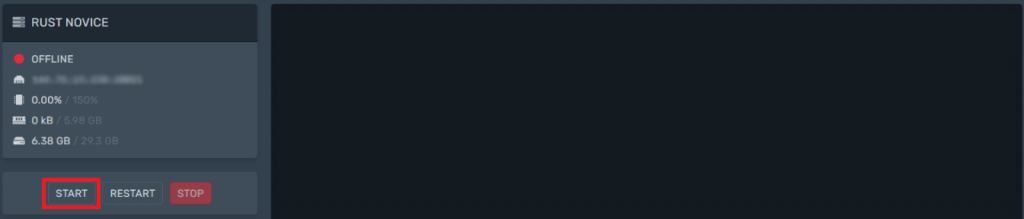
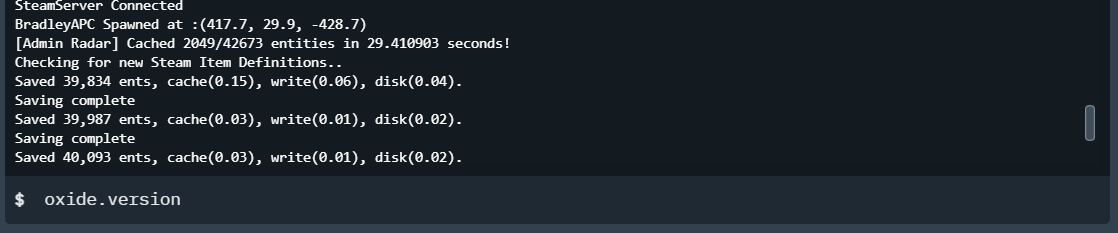
You can now start your server and wait for the uMod installation to finish. To check if everything installed right, use the “oxide.version” command. You should get a reply with the current uMod version.
Adding plugins
Everything is now ready, so we can start adding some plugins. Go to the Rust plugin section on the official uMod.org page and download any plugin you want.

Now, go back to your server file manager and navigate to the newly created oxide/plugins folder. The last step is to upload the plugin you just downloaded to this folder. For the plugin to load you will have to execute the “oxide.reload *” command which should display all the plugins installed on your server.


If you don’t know which plugins to add to your server, check our list of the best admin plugins for your Rust server.
You can also check our guide on the Gather Manager plugin, if you want to change the way Rust is played.
Permissions
You can also allow/deny the plugins to some players. Check our permission guide for more info
Looking to rent a rust server? Check out our Rust Server hosting plans
Free Rust Tools
Speed up your server with our free Rust tools:
Ready to play?
Run your own Rust server with XGamingServer
Spin up an always-on Rust server your friends can join in minutes — no port-forwarding, no tech headaches.